Tomato Growing Stages: 7 Steps From Seed to Harvest + Care Tips
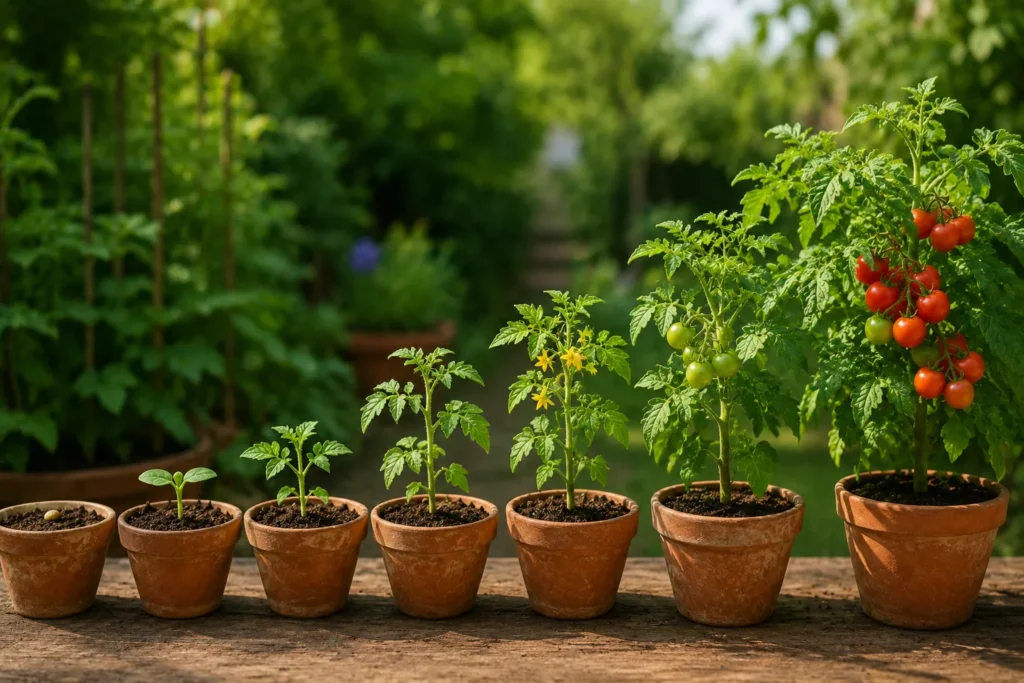
Every tomato plant moves through the same predictable sequence of tomato growing stages on its way from seed to ripe fruit. Knowing which stage your plant is in and what it needs at that exact moment is the easiest way to avoid the most common growing problems.
Quick Answer: Tomatoes pass through 7 growing stages, germination, seedling, vegetative growth, flowering, pollination, fruit formation, and ripening, taking roughly 60–100+ days from seed to harvest, depending on variety and growing conditions.
Table of Contents
How Long Does It Take to Grow Tomatoes?
From seed to harvest: roughly 60–100+ days, depending on variety and growing conditions.
| Stage | Approximate Time |
| Germination | 5–10 days |
| Seedling | 2–3 weeks |
| Vegetative growth | 20–25 days |
| Flowering | 20+ days |
| Fruit development | 3–7 weeks |
| Ripening | 2–3 weeks |
These stages overlap, flowering, pollination, and fruit development often happen at the same time on different parts of the plant, so the individual durations above shouldn’t simply be added together. The 60–100+ day estimate already accounts for that overlap.
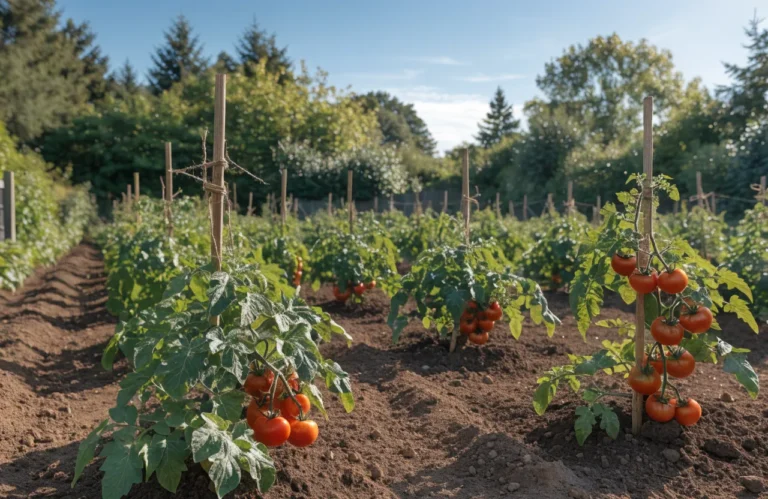
Nursery transplants reach harvest sooner than seed-grown plants, since the seedling stage is already done for you. Determinate (bush) varieties move through the tomato-growing stages faster and ripen most fruit in one concentrated window; indeterminate (vining) varieties keep growing, flowering, and fruiting all season, spreading the harvest out much longer. Outdoor-grown plants and slow-maturing heirlooms can take 90–140 days total once weather and transplant shock are factored in.
Baseline care, every stage: Most tomatoes want 6–8 hours of direct sun and about 1–2 inches of water a week, applied at soil level. Treat that as the default throughout, each stage below only calls out what changes from it.
Stage 1: Germination
Priority: Warmth + Moisture
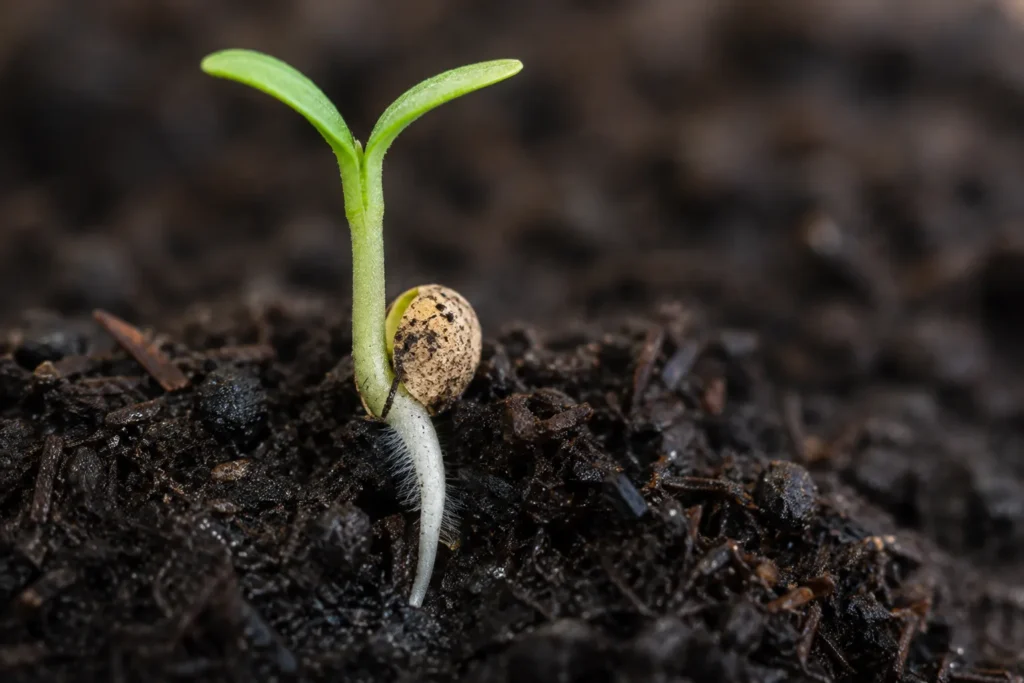
Sow seeds indoors six to eight weeks before your last expected frost. Inside the seed, a root (the radicle) pushes down while a shoot carrying two seed leaves pushes up toward light. Within 5–10 days you’ll see a thin, pale shoot topped with two smooth, oval cotyledon leaves, not true leaves yet, just a temporary energy source.
What it needs:
- Soil temperature around 70–75°F (21–24°C); a heat mat speeds things up noticeably
- Consistently moist, never soggy, growing medium, more important here than light or feeding
- A light, well-draining seed-starting mix, see our guide to the best soil for tomatoes if you’re mixing your own
Common problems: No sprout after two weeks usually means soil that’s too cold or too dry, not a bad seed. Seedlings collapsing at the soil line (“damping off”) points to overly wet, poorly ventilated conditions. Don’t fertilize yet, the seed carries enough stored energy on its own.
Stage 2: Seedling
Priority: Light
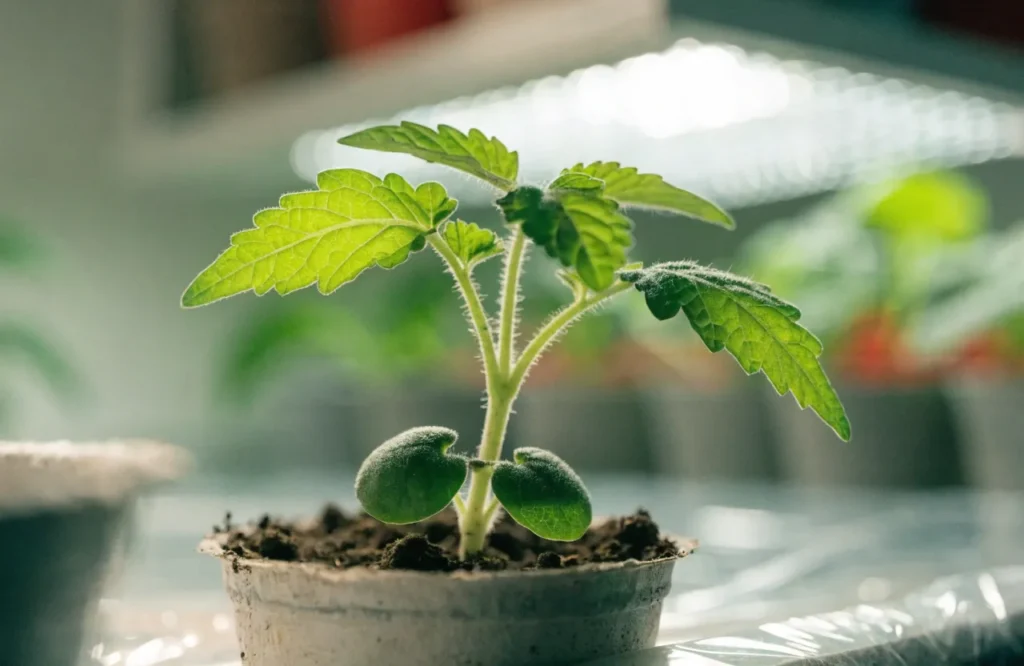
Over the next two to three weeks, the plant grows its first “true leaves”, serrated, tomato-shaped leaves that take over photosynthesis from the cotyledons, while the roots fill out underground. You’ll see a bushier plant with one or two sets of true leaves above the rounder cotyledons and a firming stem.
What it needs:
- 14–16 hours of light a day, ideally from a grow light, the single biggest factor in a strong seedling
- A move into a larger pot (“pricking out”) once a couple of sets of true leaves have formed
- Deeper planting at each transplant, burying more stem builds extra roots along the buried section
Common problems: Leggy, pale, stretched seedlings almost always mean insufficient light. Purple-tinged leaves can signal phosphorus deficiency, though cold room temperatures are worth ruling out first. Turn pots a quarter turn every day or two under a single light source so seedlings grow straight.
Stage 3: Vegetative Growth
Priority: Roots + Structure
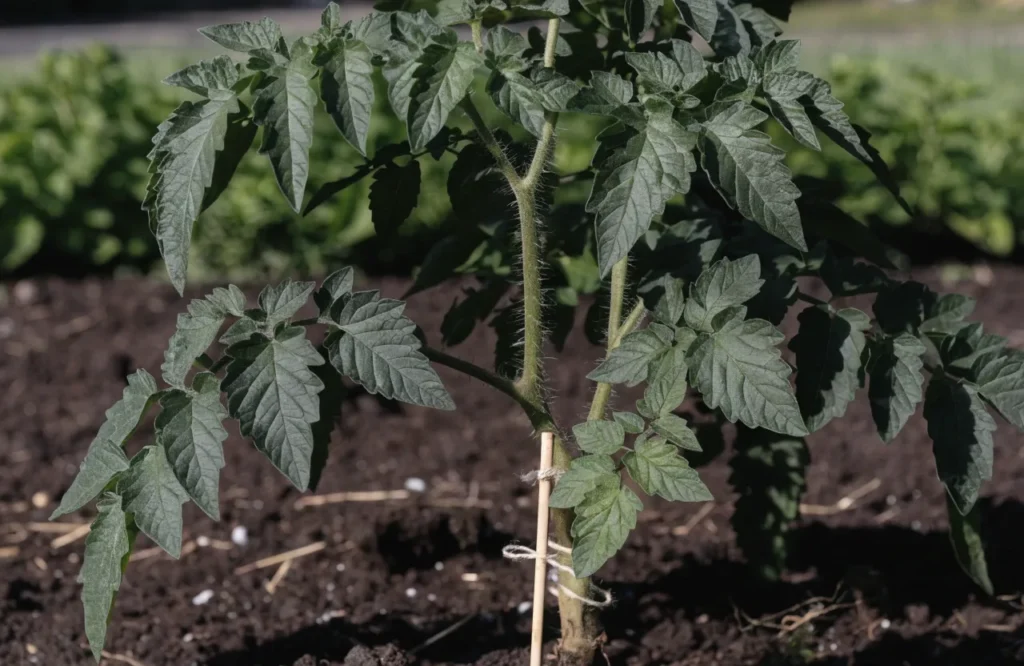
Seedlings move outdoors or into their final container once soil hits at least 65–70°F (18–21°C). Over roughly 20–25 days the plant puts on rapid growth: a thickening stem, multiplying foliage, and a root system that expands quickly. Expect a bushy, upright plant with dense, dark green leaves and multiple branching stems — no flowers yet.
What it needs:
- Sideshoots (suckers) pinched off on indeterminate varieties to keep the plant manageable
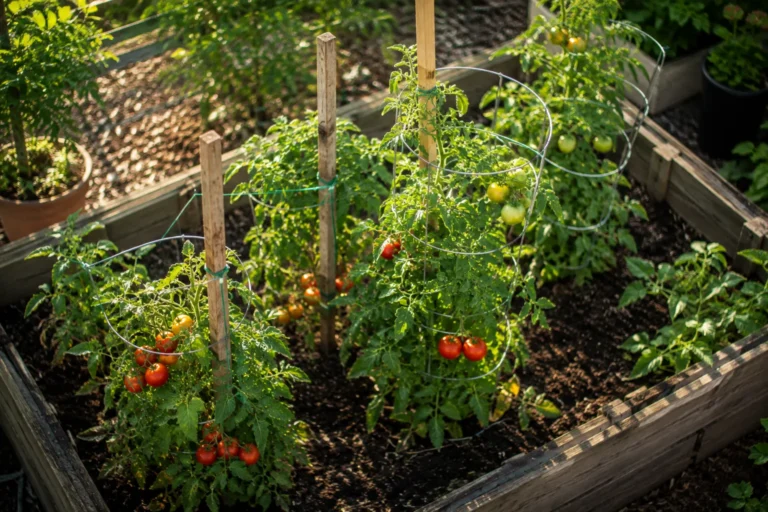
- Stakes, cages, or trellising installed now, before the plant gets top-heavy
- Deep, regular watering and a balanced fertilizer
Common problems: Yellowing lower leaves are often normal shedding, but persistent yellowing can mean uneven watering or a nitrogen deficiency, see our full breakdown of why tomato leaves turn yellow for 18 causes and fixes. Foliage that’s spotted, curling, or wilting rather than just yellowing is worth checking against our tomato plant diseases guide.
When to prune: Start once the plant is established and actively growing, typically partway through this stage. Indeterminate varieties benefit from regular sucker removal and stripping leaves that touch the soil or are shaded or diseased, while keeping enough foliage to shield fruit from sunscald. Determinate varieties need much less pruning, since removing too much foliage can cut into their harvest. For the full method, see how to prune tomato plants in 7 steps.
Stage 4: Flowering
Priority: Light + Temperature
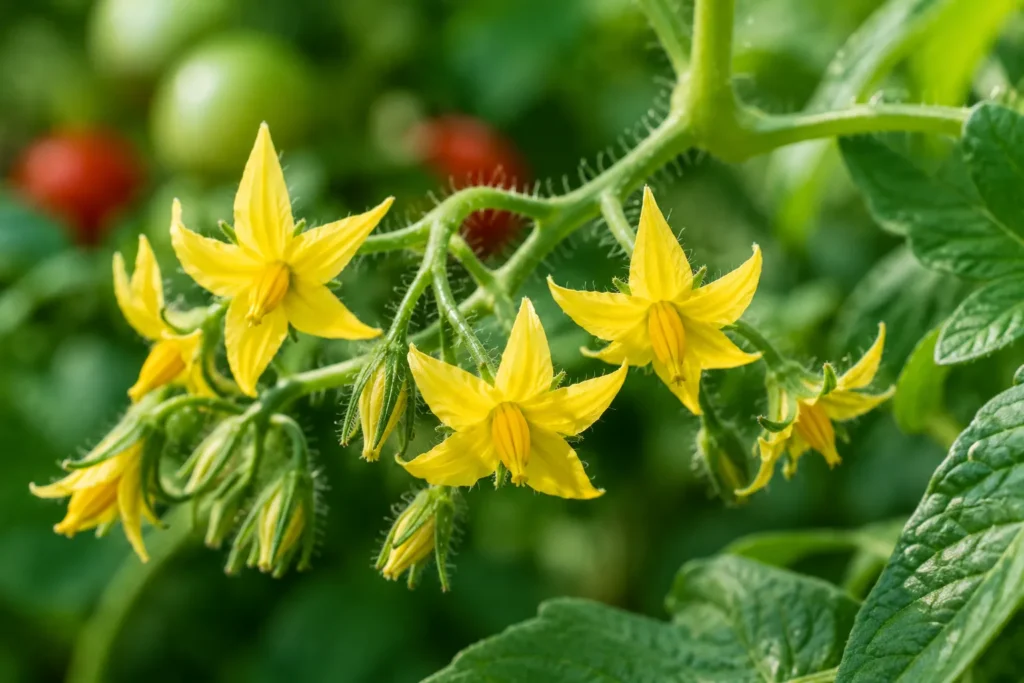
Around five to seven weeks after germination, once the plant is roughly 12–18 inches tall, small yellow, five-petaled flowers begin opening in clusters. Determinate varieties flower in one concentrated burst; indeterminate varieties keep producing new blooms all season.
What it needs:
- Temperatures in a moderate range, this matters more here than at any other stage
- Tomato fertilizer per the label, avoiding excess nitrogen, which favors leafy growth over flowers and fruit, our guide to the best fertilizer for tomatoes covers what to look for and when to feed
Common problems: Flower drop is usually temperature swings, blossoms abort when daytime highs top 85°F (29°C) or nights drop below 55°F (13°C). High humidity has a similar effect. There’s rarely a fix beyond patience; a healthy indeterminate plant keeps producing new blossoms regardless.
Stage 5: Pollination
Priority: Successful Fruit Set
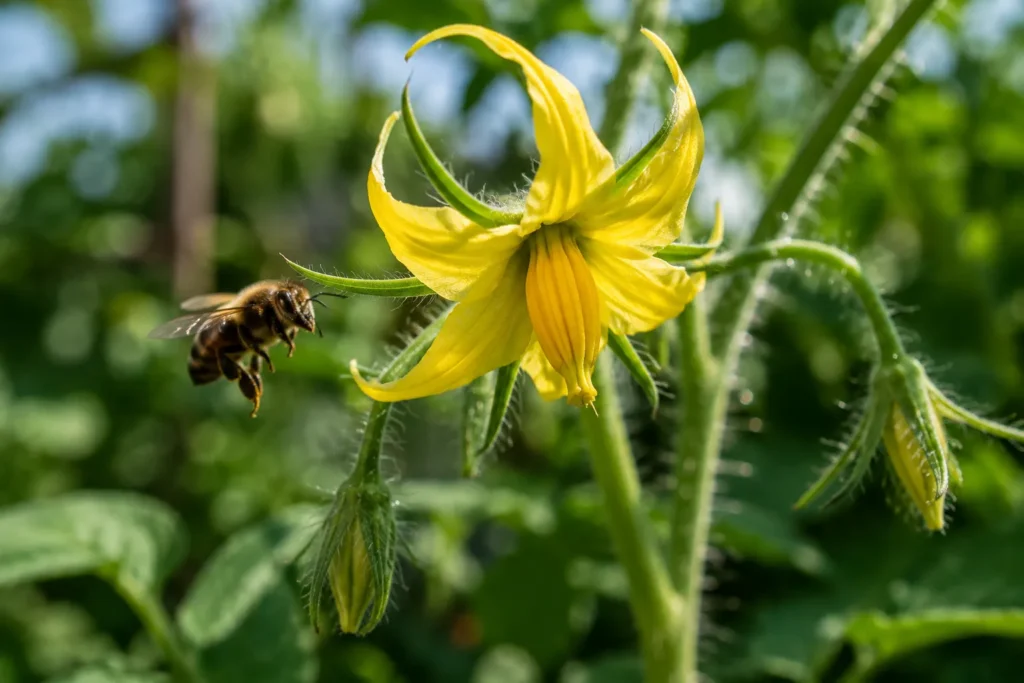
Pollination technically happens during flowering rather than as a separate period, but it earns its own stage because it’s what actually determines whether a flower becomes fruit. Each flower is receptive for just two to four days after opening. Tomatoes self-pollinate, but wind, insects (especially bumblebees), and simple movement help transfer pollen within each bloom. A successfully pollinated flower’s center darkens and drops within about a day, leaving a swelling fruit behind.
What it needs:
- Moderate temperatures, above roughly 85°F (29°C), pollen gets too sticky to transfer well
- A gentle shake of flower clusters every couple of days indoors or in a greenhouse, mimicking bee vibration
- Pollinator-friendly companions outdoors, see our list of the best tomato companion plants for what to plant nearby, like marigolds or borage, and what to avoid
- Open vents in a greenhouse so bees can get in and out
Common problems: Lots of flowers but little fruit usually means excess heat or humidity, or simply too little pollinator activity. A small fan or an electric toothbrush pressed gently against the flower truss can substitute for wind and bees indoors.
The sequence after a flower is pollinated: flower → tiny green fruit → expanding fruit → breaker stage → ripe tomato. Petals wither and fall as the ovary swells into what becomes the tomato, and the flower stem turns green, a sign it’s now feeding fruit rather than bloom.
Stage 6: Fruit Formation
Priority: Consistent Moisture
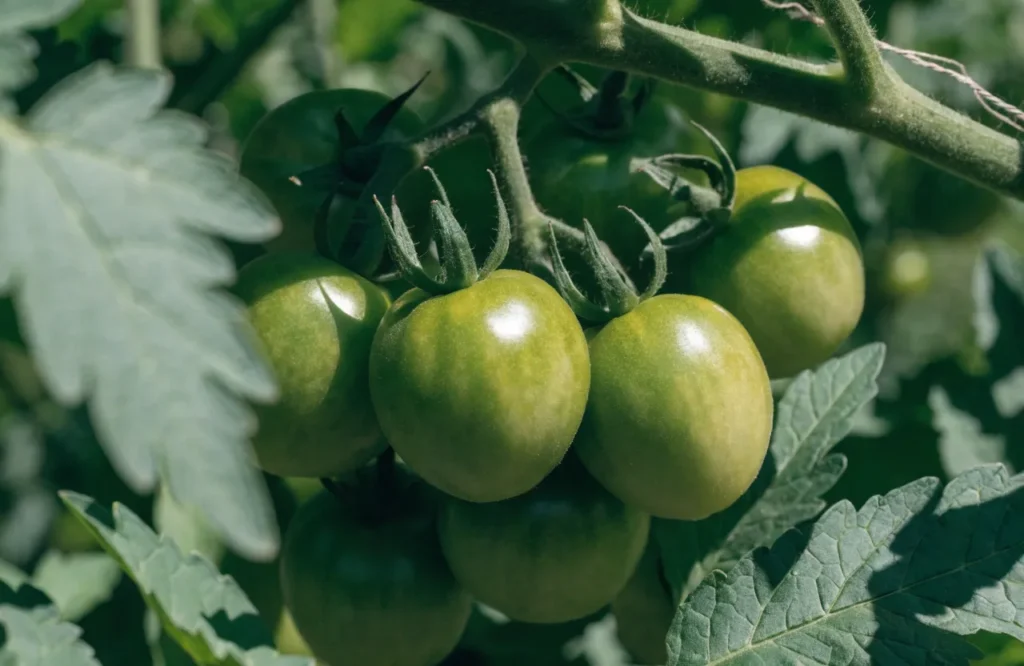
Growth is slow for the first couple of weeks after pollination, fruit stays small, hard, and green, before shifting into a faster phase that runs three to seven weeks depending on variety. You’ll see small, firm, bright-green fruit, roughly marble to golf-ball sized, clustered where flowers used to be.
What it needs:
- Even soil moisture above all else, the biggest factor in fruit quality here, and the root cause of most problems below
- Continued balanced feeding per the fertilizer label
- Mulch around the base to help keep moisture consistent
Common problems: Dark, sunken, leathery patches on the fruit’s bottom point to blossom end rot, usually inconsistent watering rather than a soil calcium shortage; see our complete guide to blossom end rot causes, symptoms, and prevention for the full fix. Splitting or cracking typically follows a heavy watering (or rain) after a dry spell, when fruit swells faster than the skin can keep up. A consistent watering schedule, see how often you should actually water tomato plants, prevents more problems here than any fertilizer can fix.
Stage 7: Ripening
Priority: Harvesting at the Right Time
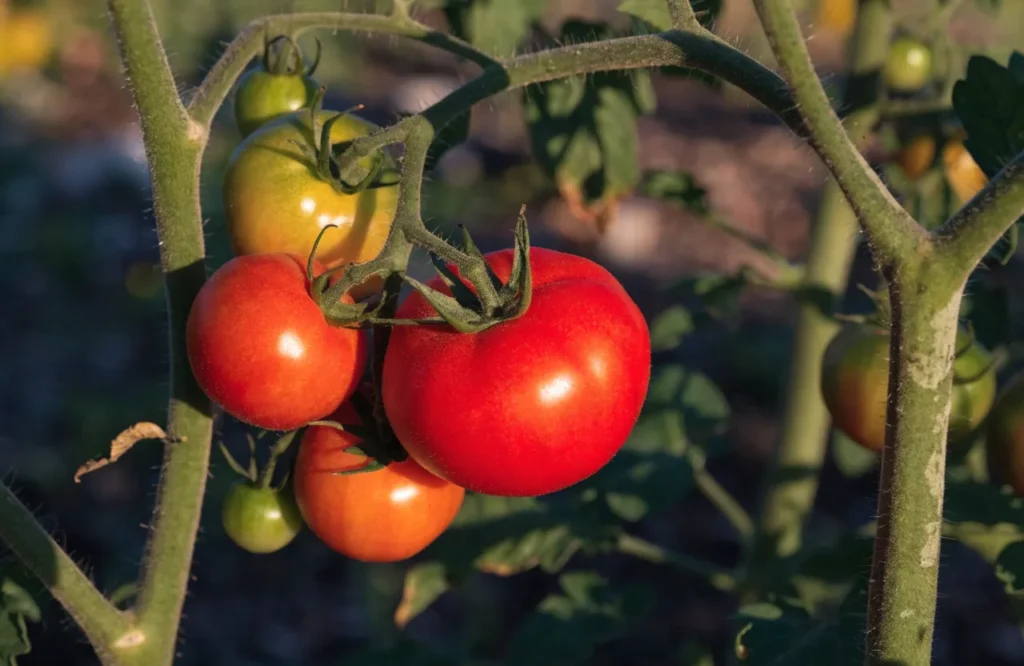
Fruit shifts from green through a “breaker” stage, a faint blush of pink or yellow, to its full mature color: red, orange, yellow, or purple, depending on variety. Ripening happens best within a fairly narrow window, roughly 68–77°F (20–25°C). Look for deepening, even color from stem to blossom end and a slight give under gentle pressure.
What it needs:
- Mostly just watching and picking at the right moment
- Protection from intense direct sun, which can cause sunscald or uneven coloring (“green shoulders”)
- An eye out for pests and birds, which often target fruit right as it ripens
Common problems: Pale or white patches usually mean sunscald. Cracking can still happen here from the same watering inconsistencies as fruit formation.
Harvesting: Pick when fruit gives slightly under gentle pressure, shows even color, and twists off the vine easily. If pests, birds, or weather are a concern, harvest at the breaker stage and let fruit finish ripening indoors, it will. Avoid refrigerating fresh tomatoes; below about 55°F (13°C) dulls flavor. Ripe fruit keeps well at room temperature for several days.
Determinate vs. Indeterminate Tomatoes
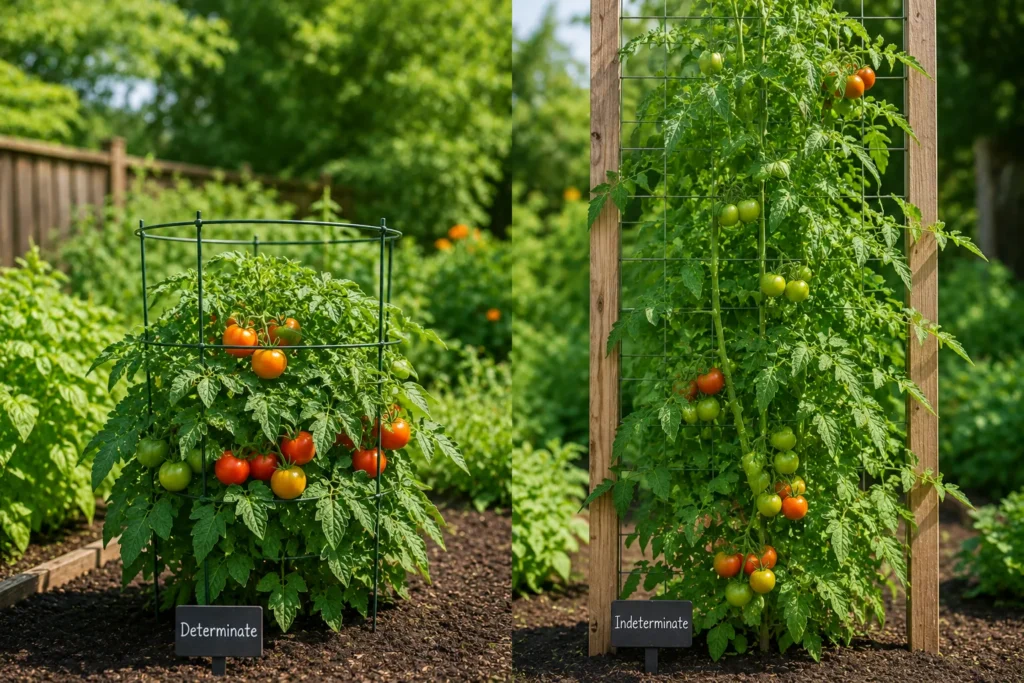
Knowing which type you’re growing changes how you plan for nearly every stage above.
| Feature | Determinate | Indeterminate |
| Growth | Compact, grows to a set size | Continues all season |
| Harvest | Mostly one concentrated period | Spread across the whole season |
| Best for | Containers, small spaces | Large gardens, long seasons |
| Support | Smaller cage or stake | Sturdy stakes or trellising, usually essential |
| Pruning | Minimal to none | Benefits from regular sucker removal |
Neither is objectively better, it comes down to whether you want one big harvest for canning and sauces, or a slow, steady supply through the season.
Growing Tomatoes in Pots
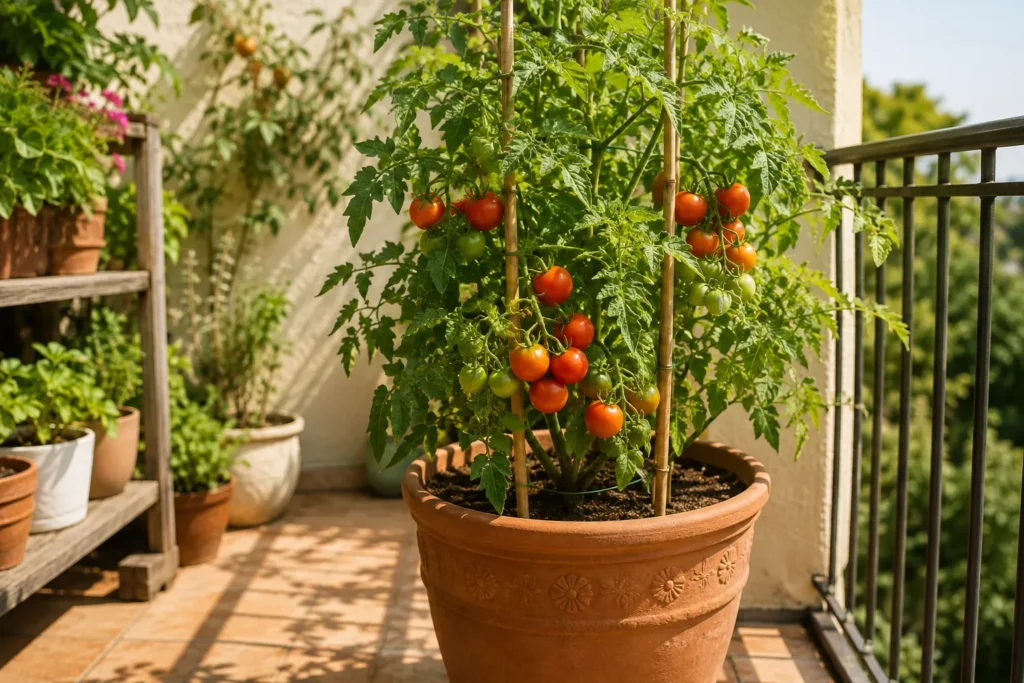
Container tomatoes move through the same seven growing stages, with a few adjustments that make a real difference. For a full walkthrough, see our complete beginner’s guide to growing tomatoes in pots.
Choosing a pot: Indeterminate varieties need at least a 24-inch container; determinate types can manage in 18 inches. Undersized pots restrict roots and are linked to more frequent blossom end rot. Match the variety to your space, dwarf/patio types for balconies, compact determinate for small pots, indeterminate with strong support for large patios.
Watering & feeding: Pots dry out faster than garden beds, especially during vegetative growth and fruiting, check soil daily in hot weather and water deeply when the top inch is dry. Nutrients also leach out faster, so feed on a consistent schedule (roughly weekly once flowering starts, per the product label).
Support: Add a stake or cage early, even in a pot, a fruit-laden container plant can tip over surprisingly easily without one.
10-step container checklist:
- Choose a determinate, dwarf, or patio variety bred for container life
- Pick a pot at least 18–24 inches across with good drainage
- Fill with quality potting mix, ideally enriched with compost
- Plant deep, bury the stem up to the lowest set of true leaves
- Water thoroughly right after planting
- Add support immediately, not once the plant is heavy with fruit
- Place in full sun, 6–8 hours of direct light daily
- Water deeply whenever the top inch of soil is dry
- Feed regularly once flowering starts, per the fertilizer label
- Harvest fruit as it ripens rather than waiting for the whole plant to finish
Growing Tomatoes Indoors
- Light is the limiting factor: without 14–16 hours of strong light, indoor plants stretch and turn leggy instead of compact and sturdy
- Pollination needs help: without wind or bees, hand-pollinate by gently shaking flower clusters or brushing pollen between blooms
- Airflow matters: a small fan strengthens stems, aids pollination, and cuts the humidity fungal diseases thrive in
- Watch temperature: aim for 65–85°F (18–29°C); spikes above that, especially near heating vents, can trigger flower drop
- Compact varieties do best: dwarf or patio determinate types suit full indoor growing better than sprawling indeterminate ones
Common Problems at Each Stage of Growing Tomatoes
| Stage | Common Problem | Likely Cause |
| Germination | Seeds don’t sprout | Soil too cold or too dry |
| Seedling | Leggy growth | Not enough light |
| Vegetative | Yellow leaves | Uneven watering or nitrogen deficiency |
| Flowering | Flower drop | Temperatures too hot or too cold |
| Pollination | Poor fruit set | Excess heat/humidity or lack of pollinators |
| Fruit Formation | Blossom end rot | Inconsistent watering |
| Ripening | Cracking or sunscald | Watering swings or excess direct sun |
If a problem doesn’t fit the watering-or-light pattern above, spotted, mottled, or wilting foliage, for example, it’s worth ruling out disease. Our complete guide to 22 tomato plant diseases covers identification, treatment, and prevention for each.
Frequently Asked Questions
How long does it take for a tomato to grow from seed to harvest?
Most varieties take roughly 60–100 days from seed to first ripe fruit under good conditions, though the exact time depends on variety and growing conditions.
What are the 7 stages of tomato growth?
The 7 stages are: germination (5–10 days), seedling (2–3 weeks), vegetative growth (20–25 days), flowering (20+ days), pollination, fruit formation (3–7 weeks), and ripening (2–3 weeks).
Why are my tomato flowers falling off?
Flower drop is usually caused by temperature swings. Blossoms abort when daytime highs top 85°F (29°C) or nights are too cold. Lots of flowers but little fruit usually means excess heat or humidity, or too little pollination.
How often should I water tomatoes during fruit development?
Even soil moisture is the biggest factor in fruit quality during this stage. Dark, sunken patches (blossom end rot) usually point to inconsistent watering, and cracking follows heavy watering after a dry spell.
How long does it take for green tomatoes to turn red?
Ripening takes about 2–3 weeks. Fruit shifts from green through a ‘breaker’ stage—a faint blush of pink or yellow—to its full mature color. Pick when fruit gives slightly under gentle pressure and shows even color.
Final Thoughts
Once you know which of the stages your plant is in, you can give it exactly what it needs, warmth during germination, strong light through the seedling and vegetative stages, and consistent moisture while fruit develops and ripens. Each stage has one main priority, and most common problems trace back to missing just that one thing.