Best Soil for Tomatoes: Create the Perfect Growing Mix for Bigger Harvests
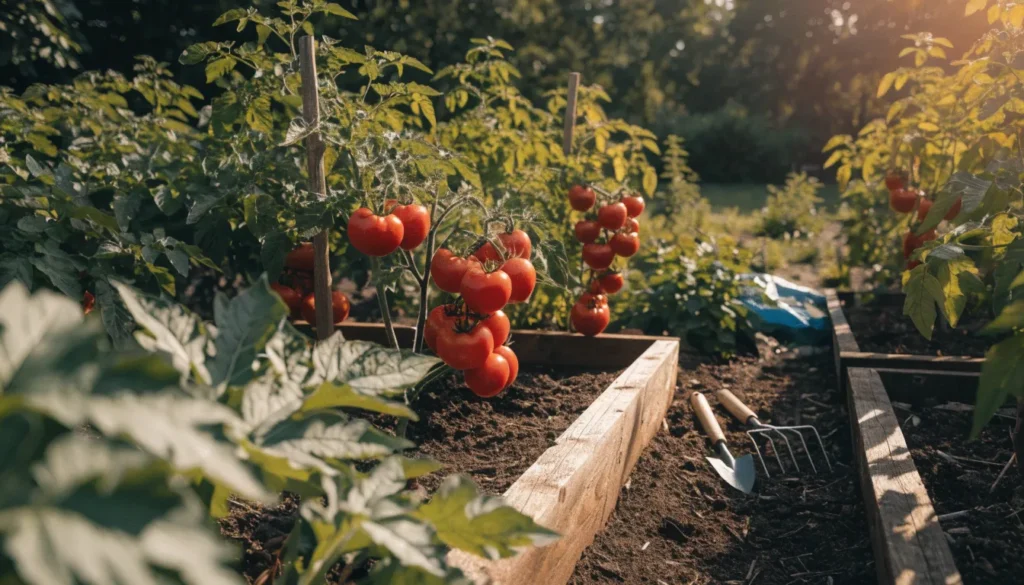
Healthy tomatoes don’t start with fertilizer, they start with healthy soil. While choosing the right variety, providing full sun, and watering consistently are all essential, the quality of your soil has the greatest influence on root development, nutrient absorption, and overall plant productivity.
Tomatoes are considered heavy feeders because they require a steady supply of nutrients throughout the growing season. However, even the best fertilizer cannot compensate for compacted, poorly drained, or nutrient-deficient soil. When roots struggle to grow, plants become more susceptible to drought stress, diseases, and reduced fruit production.
The ideal tomato soil is loose, fertile, well-drained, and rich in organic matter. It should retain enough moisture to support steady growth while allowing excess water to drain away, preventing root rot and other moisture-related problems. Just as importantly, soil should contain beneficial microorganisms that naturally improve nutrient availability and help roots thrive.
Whether you’re growing tomatoes in a backyard garden, raised bed, greenhouse, or container, building the right soil mix can significantly improve both the quality and quantity of your harvest.
Before preparing your soil, it’s also helpful to understand the complete growing process. Read our guide How to Grow Tomatoes to learn about planting, watering, sunlight, fertilizing, and harvesting tomatoes successfully.
In this guide, you’ll learn:
- The characteristics of the best soil for tomatoes
- The ideal soil pH for maximum nutrient absorption
- How to improve clay, sandy, or poor garden soil
- The best ingredients for a DIY tomato soil mix
- Expert tips to help your plants develop stronger roots and produce larger harvests
By understanding what tomato plants need below the surface, you’ll create the ideal growing environment for healthier plants and more flavorful tomatoes.
Table of Contents
Why Soil Matters for Tomato Plants
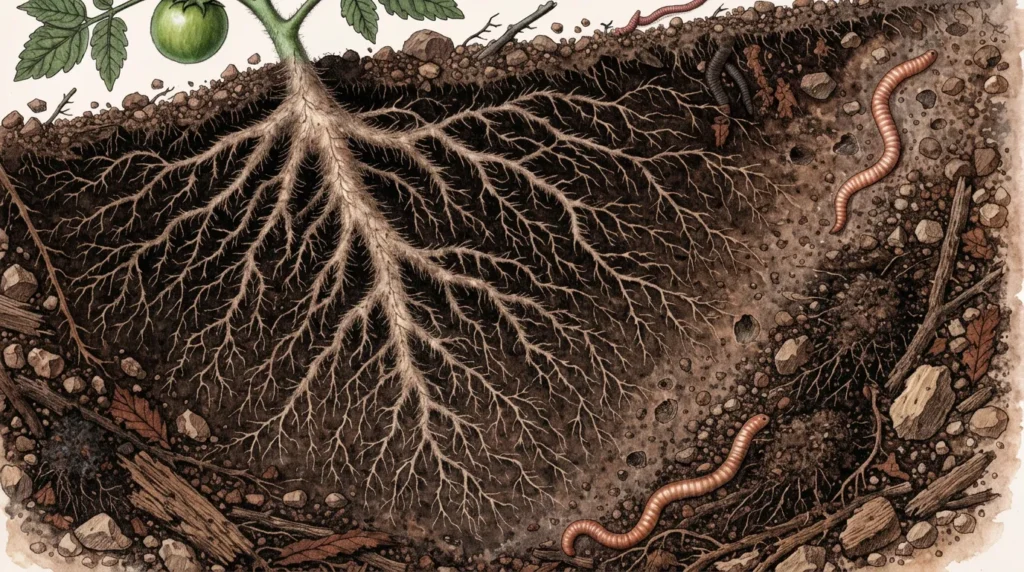
Healthy soil does far more than hold a plant upright. It provides water, oxygen, nutrients, and a living ecosystem that supports root development throughout the growing season.
Tomato plants develop extensive root systems that can spread several feet in loose, fertile soil. These roots anchor the plant while continuously searching for water and nutrients needed for vigorous growth and fruit production. If the soil is compacted or poorly drained, root growth slows, making plants less productive and more vulnerable to environmental stress.
A healthy soil structure supports tomatoes in four essential ways.
1. Strong Root Development
Roots are the foundation of every healthy tomato plant.
Loose, well-aerated soil allows roots to spread freely, increasing the plant’s ability to absorb water and nutrients. Larger root systems also improve drought tolerance and help support heavy fruit loads later in the season.
Compacted soil, on the other hand, restricts root growth by limiting oxygen availability. Even if plenty of fertilizer is present, plants growing in dense soil often remain stunted because their roots cannot fully access those nutrients.
Healthy roots help tomato plants:
- Absorb nutrients more efficiently
- Tolerate heat and dry conditions
- Produce more flowers and fruit
- Recover faster from transplant shock
- Resist environmental stress
2. Better Nutrient Availability
Tomatoes require a balanced supply of both macronutrients and micronutrients throughout the growing season.
Healthy soil provides the foundation for nutrient uptake, but choosing the right fertilizer is equally important. Learn more in our guide to the Best Fertilizer for Tomatoes to discover when and how to feed your plants for maximum yields.
The primary nutrients include:
- Nitrogen (N): Supports healthy leaf and stem growth.
- Phosphorus (P): Encourages strong roots, flowering, and early fruit development.
- Potassium (K): Improves fruit size, flavor, and disease resistance.
Tomatoes also rely on calcium, magnesium, sulfur, iron, and several trace minerals to support healthy growth.
However, nutrients are only available when soil conditions are favorable. Soil pH, moisture, organic matter, and microbial activity all influence how effectively roots absorb these nutrients.
A garden may contain abundant nutrients, but if the soil is compacted or the pH is outside the ideal range, tomato plants can still develop nutrient deficiencies.
3. Proper Moisture Balance
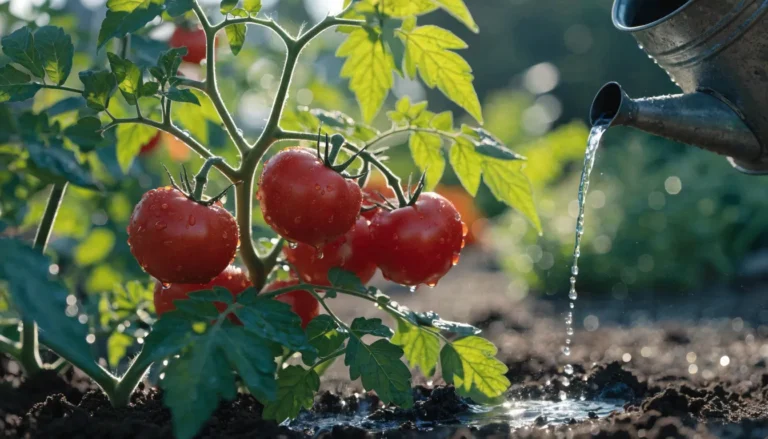
Tomatoes need consistently moist soil, but they do not tolerate constantly wet roots.
Good tomato soil acts like a sponge. It stores enough water for roots to access between watering while allowing excess moisture to drain away quickly.
Maintaining this balance helps:
- Prevent root rot
- Reduce plant stress during hot weather
- Minimize fruit cracking caused by inconsistent watering
- Improve nutrient uptake
Organic matter such as compost plays a major role by increasing the soil’s water-holding capacity without sacrificing drainage.
4. Healthy Soil Biology
Healthy soil is alive.
Millions of beneficial bacteria, fungi, earthworms, and other microorganisms work continuously to decompose organic matter and release nutrients that tomato roots can absorb.
Among the most valuable organisms are mycorrhizal fungi, which form a natural partnership with tomato roots. Their thread-like structures extend far into the surrounding soil, increasing the plant’s ability to absorb phosphorus, water, and essential minerals.
Healthy soil biology also helps:
- Improve soil structure
- Increase nutrient efficiency
- Suppress certain soil-borne diseases
- Enhance drought tolerance
Adding compost regularly and minimizing unnecessary soil disturbance encourages these beneficial organisms to thrive.
Pro Tip: Avoid overusing chemical fertilizers or fungicides unless necessary. Excessive applications can reduce beneficial microbial activity, making your soil less productive over time.
What Is the Best Soil for Tomatoes?
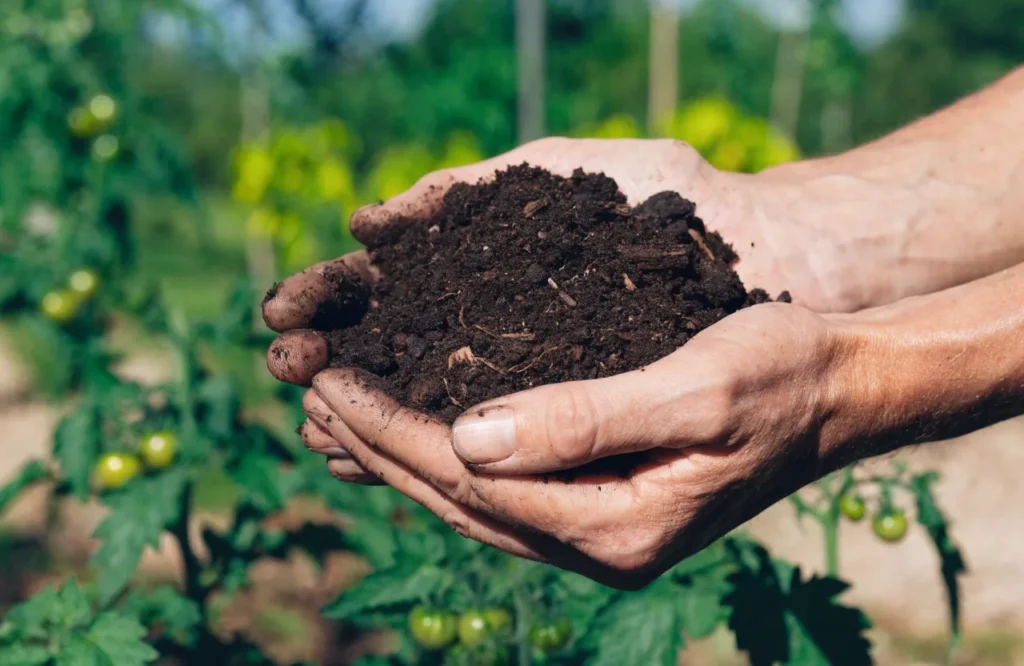
The best soil for tomatoes is a rich, loose, well-draining loam with plenty of organic matter and a slightly acidic pH between 6.0 and 6.8.
Loamy soil combines the advantages of sand, silt, and clay, creating an ideal environment for tomato roots.
An ideal tomato soil should provide:
- Excellent drainage
- Good moisture retention
- High organic matter content
- Plenty of oxygen around roots
- A thriving population of beneficial microorganisms
A balanced growing mix generally contains:
- 40–50% quality topsoil or garden soil
- 25–35% finished compost
- 20–30% aeration materials such as perlite, pumice, coco coir, or aged pine bark
These ingredients work together to provide both nutrients and structure while preventing common problems associated with heavy or sandy soils.
The Four Characteristics of Ideal Tomato Soil
Loose and Well-Aerated
Roots require oxygen as much as they need water.
Dense, compacted soil limits airflow and slows root development. Loose soil allows roots to expand freely, creating healthier, more productive plants.
Adding compost and coarse organic materials helps improve soil texture while maintaining good aeration.
Rich in Organic Matter
Organic matter is the engine of healthy garden soil.
As compost breaks down, it releases nutrients gradually while improving moisture retention and feeding beneficial microorganisms.
Soils containing at least 5–10% organic matter generally support stronger tomato growth than soils with little organic material.
Well-Draining but Moisture-Retentive
One of the biggest challenges in tomato gardening is maintaining consistent soil moisture.
Excessively dry soil causes blossom drop, fruit cracking, and reduced yields, while waterlogged soil increases the risk of root diseases.
The best tomato soil retains moisture without becoming saturated, allowing roots to breathe while staying evenly hydrated.
Deep Enough for Root Growth
Tomatoes are deep-rooted plants.
Most varieties perform best in soil that is at least 12–18 inches deep, allowing roots to spread downward in search of moisture and nutrients.
For containers, larger pots provide more stable soil moisture and healthier root systems than smaller containers.
The Ideal Soil pH for Tomatoes
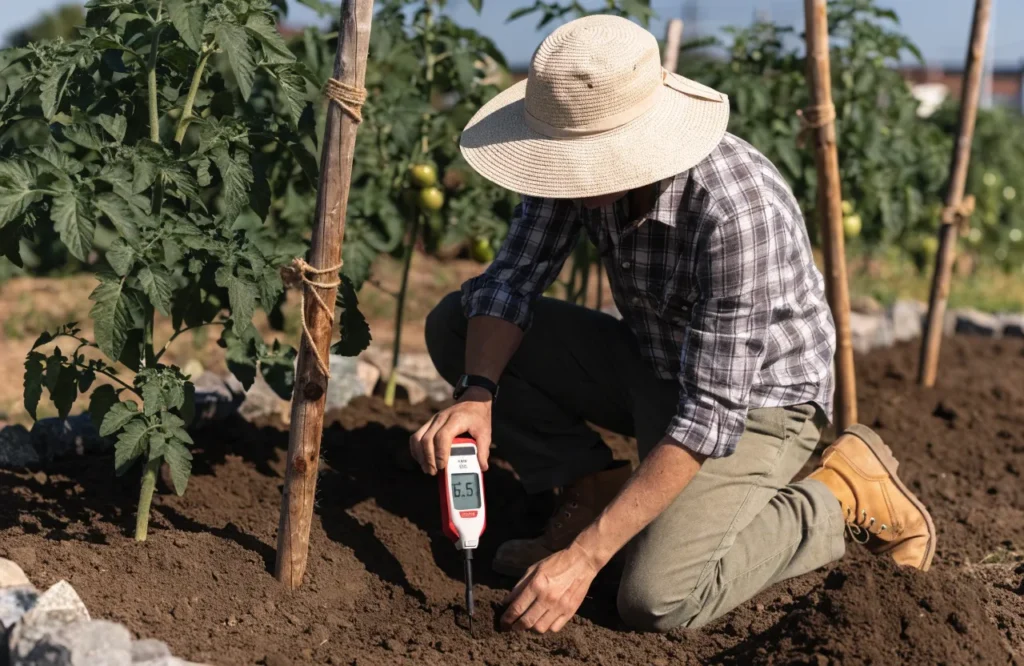
Soil pH determines how easily tomato plants absorb nutrients.
Even nutrient-rich soil may produce weak plants if the pH falls outside the ideal range.
The recommended soil pH for tomatoes is:
6.0 to 6.8
This slightly acidic range keeps essential nutrients such as phosphorus, potassium, calcium, and magnesium readily available to plant roots.
According to recommendations from Cornell Cooperative Extension and several university horticulture programs, tomatoes perform best within this pH range because nutrient availability is at its highest.
What Happens When Soil Is Too Acidic?
When soil pH drops below 6.0:
- Calcium becomes less available.
- Root growth may slow.
- Nutrient deficiencies become more common.
- Plants may produce fewer flowers and fruits.
Extremely acidic soils can also reduce microbial activity, limiting the natural breakdown of organic matter.
What Happens When Soil Is Too Alkaline?
When soil pH rises above 7.0:
- Iron becomes less available.
- Phosphorus uptake declines.
- Leaves may develop yellowing between veins (iron chlorosis).
- Overall growth slows despite adequate fertilization.
Because many nutrient problems are actually caused by incorrect pH rather than nutrient shortages, testing your soil before making adjustments is one of the most valuable steps you can take.
How to Adjust Soil pH for Tomatoes
Before adding any soil amendments, test your soil using a reliable home soil test kit or your local agricultural extension service. Guessing can often create bigger problems than the original imbalance.
If Your Soil Is Too Acidic
To gradually raise soil pH, consider adding:
Garden Lime
Garden lime neutralizes soil acidity while increasing calcium availability.
Dolomitic Lime
Dolomitic lime supplies both calcium and magnesium, making it a good choice if your soil test indicates low magnesium levels.
Crushed Eggshells
Finely crushed eggshells provide calcium but break down slowly. They work best as a long-term amendment rather than a quick pH adjustment.
Always follow soil test recommendations, as applying excessive lime can make certain nutrients less available.
If Your Soil Is Too Alkaline
Lowering soil pH takes time, but several organic amendments can gradually improve conditions.
Options include:
Elemental Sulfur
Elemental sulfur slowly reduces soil pH through natural microbial activity.
Finished Compost
Compost improves soil health while gently buffering pH over time.
Organic Matter
Leaf mold, composted pine needles, and other organic materials help improve soil structure while supporting healthy microbial populations that naturally stabilize soil conditions.
Expert Tip: Soil pH changes gradually. It’s better to make small adjustments over time than attempt dramatic corrections in a single season.
The Perfect DIY Tomato Soil Mix
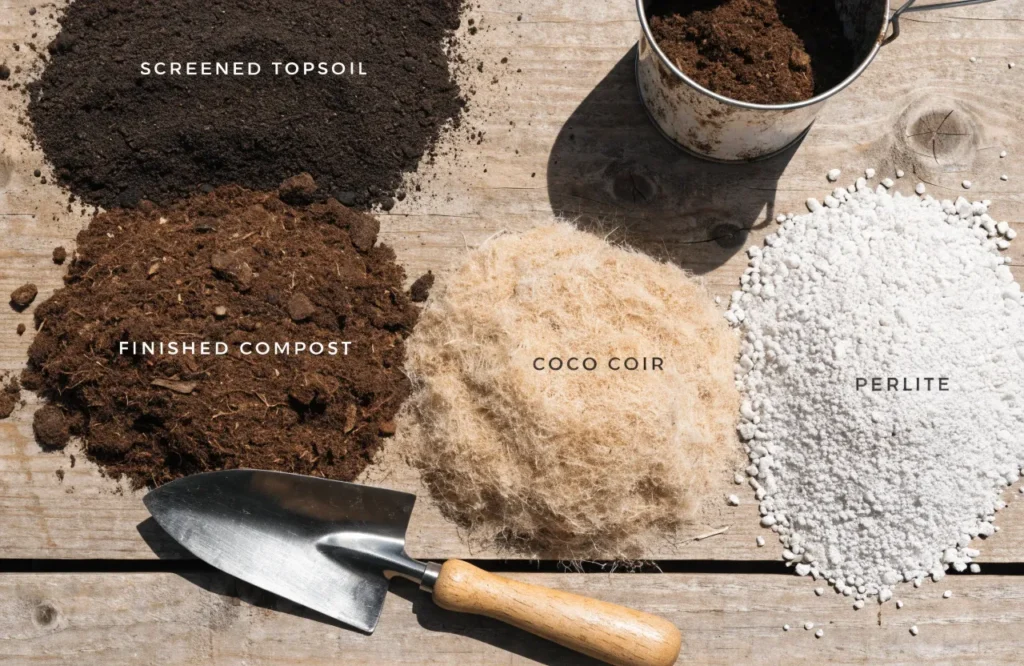
Creating your own tomato soil mix gives you complete control over drainage, moisture retention, nutrient availability, and soil biology. While commercial potting mixes are convenient, they often vary in quality and may not provide the ideal balance that tomatoes need for vigorous growth and heavy fruit production.
A well-balanced soil mix should do more than simply support the plant. It should encourage healthy root development, provide a slow release of nutrients, retain adequate moisture, and allow excess water to drain away quickly.
The best tomato soil combines four key components:
- A nutrient-rich base
- Organic matter
- Moisture-retaining materials
- Aeration materials
When these ingredients work together, they create an ideal environment for healthy roots and productive plants.
DIY Tomato Soil Mix Recipe (General Purpose)
Whether you’re planting in a garden bed or filling raised beds, this all-purpose recipe provides an excellent foundation for tomato plants.
Ingredients
| Ingredient | Amount | Purpose |
| Quality topsoil or garden soil | 40% | Provides minerals and structure |
| Finished compost | 30% | Supplies nutrients and beneficial microbes |
| Coco coir or peat moss | 20% | Improves moisture retention |
| Perlite or pumice | 10% | Increases drainage and aeration |
Mix all ingredients thoroughly before planting.
This blend creates loose, fertile soil that encourages deep root growth while maintaining the right balance between moisture and drainage.
Pro Tip: If your native soil is already rich and well-draining, replace part of the topsoil with additional compost to boost long-term fertility.
Why This Soil Mix Works
Each ingredient plays a unique role in supporting healthy tomato growth.
Topsoil
Topsoil forms the structural base of the mix.
It provides:
- Essential minerals
- Natural microorganisms
- Physical support for roots
Choose high-quality screened topsoil that is free from weeds, debris, and construction waste.
Compost
Compost is the most valuable ingredient in any tomato soil mix.
Finished compost improves nearly every aspect of soil health by:
- Increasing nutrient availability
- Feeding beneficial microorganisms
- Improving soil texture
- Enhancing water retention
- Supporting earthworm activity
Unlike synthetic fertilizers, compost releases nutrients gradually throughout the growing season.
Good compost sources include:
- Homemade compost
- Vegetable compost
- Leaf compost
- Mushroom compost
- Well-aged garden compost
Avoid unfinished compost, as it continues decomposing in the soil and can temporarily tie up nitrogen needed by young tomato plants.
Coco Coir or Peat Moss
Both coco coir and peat moss help maintain consistent soil moisture.
However, they differ in several important ways.
| Coco Coir | Peat Moss |
| Renewable resource | Slowly renewable resource |
| Nearly neutral pH | Naturally acidic |
| Excellent moisture retention | Excellent moisture retention |
| Rewets easily | Can repel water when completely dry |
| Sustainable option | Traditional gardening material |
For many gardeners, coco coir is the preferred choice because it provides excellent moisture control while being more environmentally sustainable.
Perlite or Pumice
Perlite is a lightweight volcanic mineral that creates air pockets throughout the soil.
Benefits include:
- Improved drainage
- Better oxygen flow to roots
- Reduced soil compaction
- Lower risk of root rot
Pumice provides similar benefits while adding slightly more weight, making it useful in windy areas where lightweight containers may tip over.
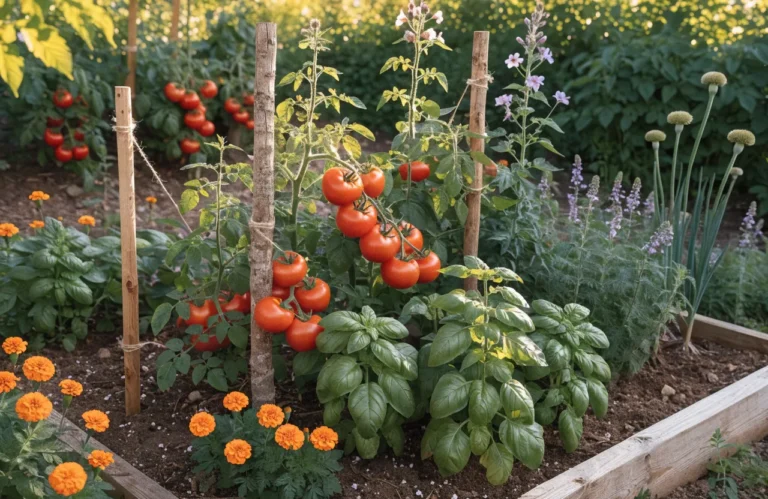
Best Soil Mix for Raised Bed Tomatoes
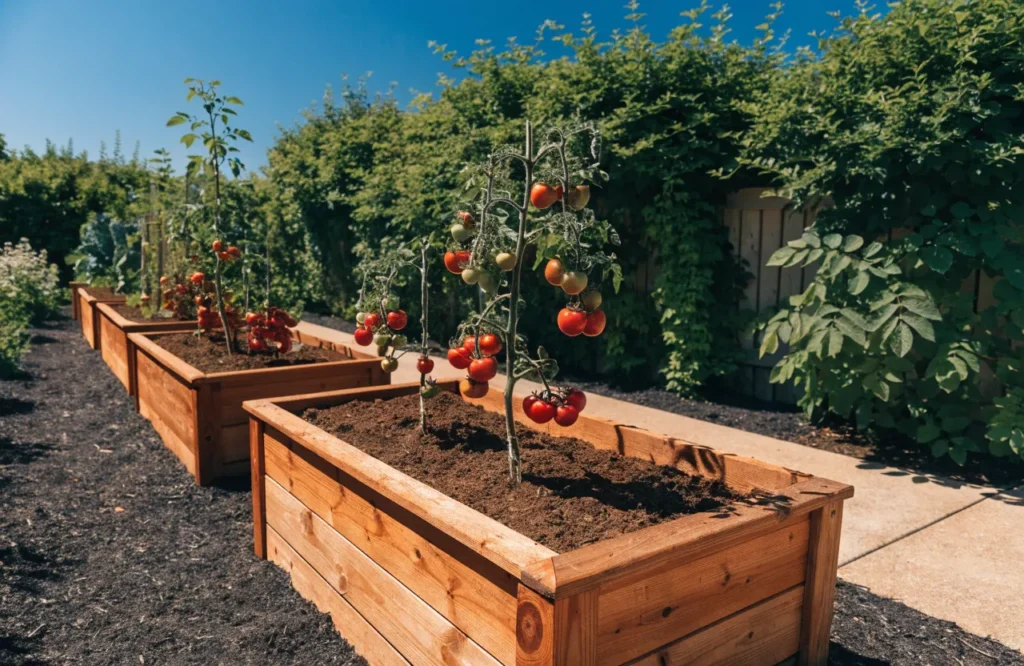
Raised beds offer one of the best growing environments for tomatoes because they allow complete control over soil quality.
Unlike in-ground gardens, raised beds warm up more quickly in spring, drain efficiently, and make it easier to maintain consistent soil conditions.
Raised Bed Soil Recipe
For a typical raised bed, use:
- 50% finished compost
- 30% quality topsoil
- 10% coco coir or peat moss
- 10% perlite, pumice, or coarse pine bark
Before planting, incorporate:
- Worm castings
- Bone meal
- Kelp meal
into the top 8–12 inches of soil.
These amendments provide slow-release nutrients that support tomatoes throughout the growing season.
Why Raised Beds Produce Better Tomatoes
Raised beds provide several important advantages.
Better Drainage
Excess water drains away more efficiently, reducing the risk of root diseases.
Faster Soil Warming
Raised beds absorb heat earlier in spring.
Research from several university extension programs shows that warmer soil encourages earlier root development and improves nutrient uptake in young tomato plants.
Tomato roots become most active when soil temperatures reach approximately 65–75°F (18–24°C).
Cold soil slows phosphorus absorption, often causing seedlings to develop purple stems or leaves despite adequate fertilizer.
Easier Soil Management
Adding compost, organic matter, and soil amendments is much simpler in raised beds than in traditional gardens.
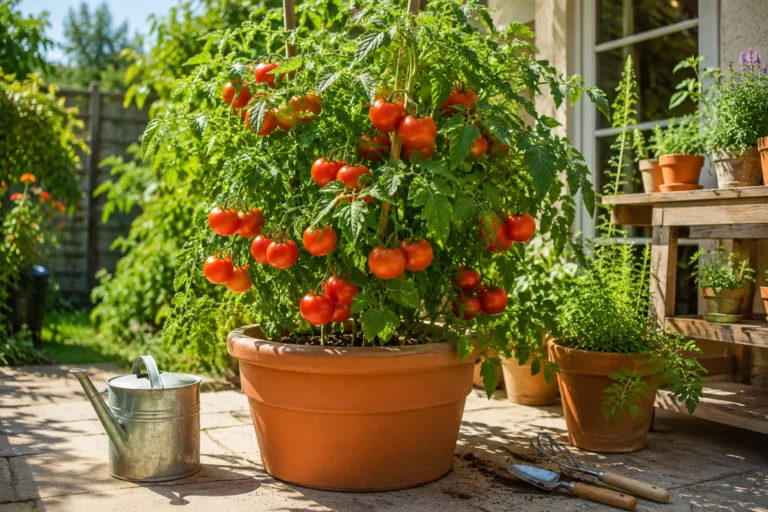
Best Soil Mix for Container Tomatoes
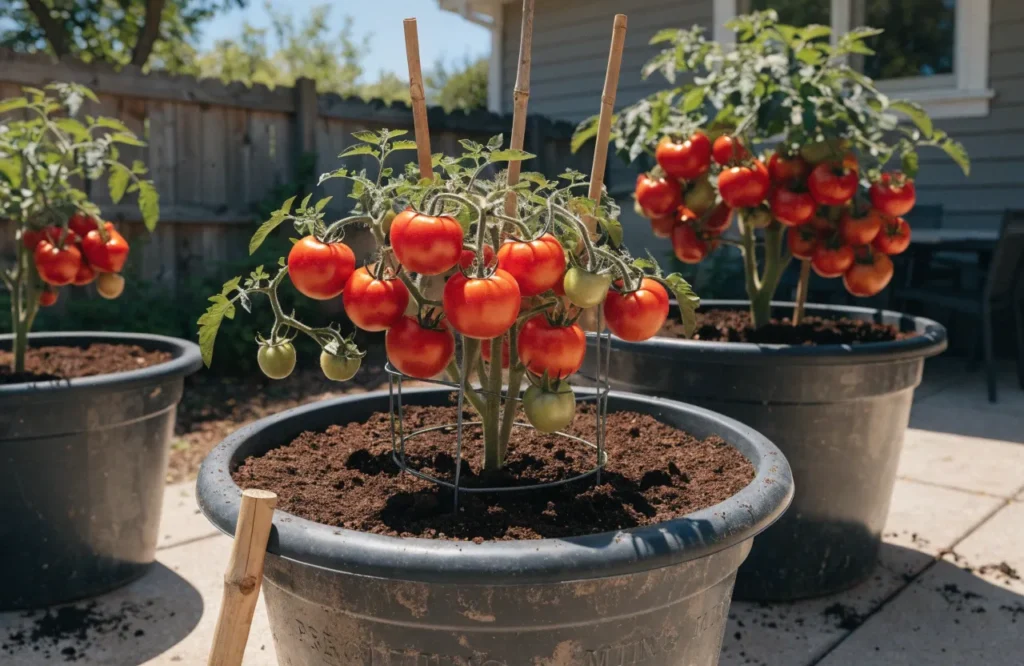
Growing tomatoes in containers requires a different approach than growing them in the ground.
Containers have limited soil volume, dry out more quickly, and rely entirely on the soil you provide.
Never fill pots with ordinary garden soil.
Garden soil becomes dense inside containers, reducing airflow and restricting root development.
Instead, use a lightweight growing mix.
DIY Container Tomato Soil Recipe
| Ingredient | Amount |
| Premium potting mix | 50% |
| Finished compost | 25% |
| Coco coir or peat moss | 15% |
| Perlite | 10% |
Optional additions:
- 1–2 cups worm castings
- Organic tomato fertilizer
- Small amount of composted manure
Mix thoroughly before filling containers.
Choosing the Right Container Size
Larger containers create healthier root systems and more stable soil moisture.
| Tomato Variety | Minimum Container Size |
| Cherry tomatoes | 5 gallons |
| Determinate tomatoes | 10 gallons |
| Indeterminate tomatoes | 15–20 gallons |
Larger containers also reduce watering frequency and provide more nutrients for long-season varieties.
Understanding the Best Soil Ingredients
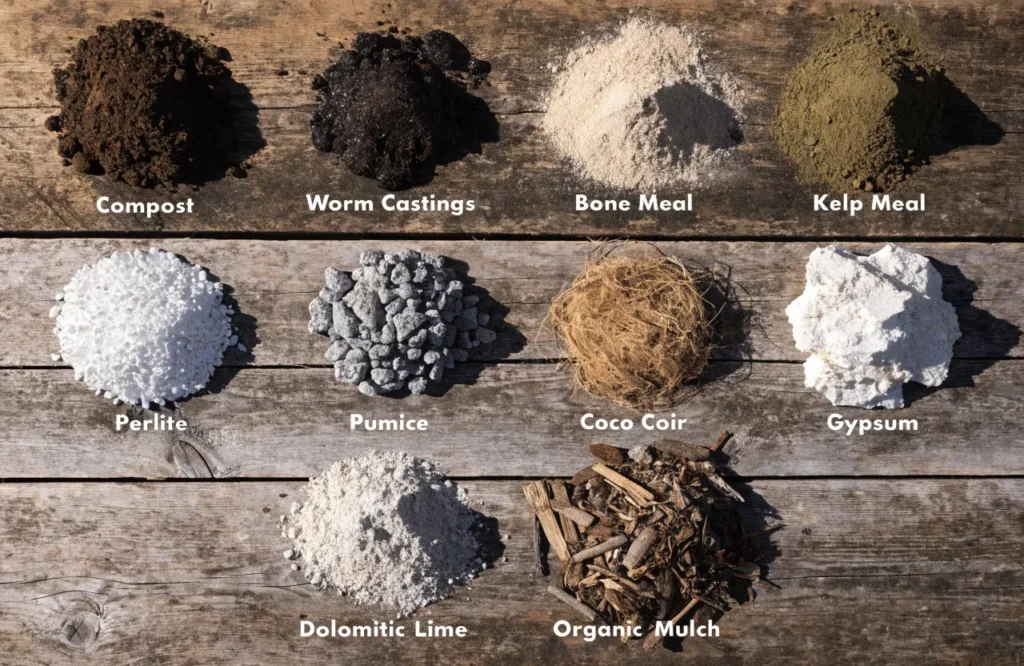
Knowing why each ingredient is included helps you customize your soil for your local growing conditions.
Compost: The Foundation of Healthy Soil
No single ingredient improves tomato soil more than finished compost.
Benefits include:
- Improved drainage
- Increased moisture retention
- Higher microbial activity
- Better nutrient availability
- Enhanced soil structure
Adding compost each season gradually builds healthier soil over time.
Expert Tip: Compost should smell earthy and crumble easily in your hands. If it has a sour odor or recognizable food scraps, it needs more time to mature.
Worm Castings: Nature’s Premium Fertilizer
Often called “black gold,” worm castings are one of the most effective natural soil amendments.
They provide:
- Gentle, slow-release nutrients
- Beneficial microorganisms
- Natural plant growth hormones
- Improved nutrient uptake
Unlike many fertilizers, worm castings will not burn plant roots, making them ideal for both seedlings and mature tomato plants.
Mix them into planting holes or use them as a side dressing during the growing season.
Bone Meal
Bone meal is an organic source of phosphorus.
It encourages:
- Strong root development
- Earlier flowering
- Better fruit production
Because phosphorus moves slowly through the soil, mixing bone meal into the planting area before transplanting is more effective than applying it later.
Kelp Meal
Kelp meal supplies more than 60 naturally occurring trace minerals along with plant growth compounds.
Benefits include:
- Stronger root systems
- Improved drought tolerance
- Better stress resistance
- Enhanced microbial activity
Although tomatoes require only small amounts, these trace nutrients contribute to healthier overall plant growth.
Calcium Sources for Tomatoes
Calcium plays an essential role in cell wall development and healthy fruit formation.
Good sources include:
- Gypsum
- Dolomitic lime
- Crushed eggshells
- Calcium-rich compost
However, many gardeners misunderstand calcium deficiency. According to the University of California Agriculture and Natural Resources (UC ANR), blossom end rot is often caused by inconsistent watering rather than a lack of calcium in the soil. When soil moisture fluctuates, the plant cannot transport calcium efficiently to developing fruit, even if adequate calcium is present. Maintaining consistent soil moisture is often more effective than simply adding more calcium.
Expert Insight: Soil Temperature Matters More Than Many Gardeners Realize
Many gardeners focus on fertilizer while overlooking soil temperature.
Even nutrient-rich soil performs poorly when it is too cold.
Young tomato roots absorb nutrients most efficiently once soil temperatures consistently remain between 65°F and 75°F (18°C–24°C).
Cool spring soils slow root growth and reduce phosphorus uptake, leading to slower plant establishment.
To warm soil naturally:
- Use raised beds
- Apply black plastic mulch before planting
- Cover soil with clear plastic for several weeks before transplanting
- Plant only after soil temperatures consistently exceed 60°F (16°C)
Healthy roots establish much faster in warm soil than in cold, wet ground.
Expert Insight: Can You Add Too Much Compost?
Compost is incredibly beneficial, but more isn’t always better.
A raised bed filled almost entirely with compost may produce lush, dark green foliage while reducing flower and fruit production.
Excessive organic matter can also:
- Hold too much moisture
- Create nutrient imbalances
- Increase nitrogen availability beyond what fruiting tomatoes need
For most gardens, compost should make up 25–35% of the total soil volume.
Balance is the key to productive tomato plants.
Expert Insight: Encourage Beneficial Mycorrhizal Fungi
Healthy tomato roots naturally form partnerships with beneficial fungi called mycorrhizae.
These fungi extend tiny thread-like structures far beyond the root system, dramatically increasing the plant’s ability to absorb:
- Phosphorus
- Water
- Zinc
- Copper
- Other trace nutrients
Gardens with healthy fungal populations often produce stronger plants that are more resilient during drought.
You can encourage these beneficial organisms by:
- Adding finished compost regularly
- Avoiding unnecessary tilling
- Limiting excessive fungicide use
- Maintaining consistent organic matter levels
Healthy soil isn’t just rich in nutrients, it’s alive.
How to Improve Poor Soil for Tomatoes
Not every garden starts with ideal soil. Some gardeners deal with heavy clay that stays wet for days after rain, while others struggle with sandy soil that dries out almost immediately. Fortunately, nearly any soil can be improved with the right combination of organic matter, proper cultivation, and ongoing maintenance.
The key is to improve the structure of your soil rather than relying solely on fertilizer. Healthy soil provides a stable environment where roots can grow deeply, beneficial microorganisms can thrive, and nutrients remain available throughout the growing season.
Before making improvements, identify your soil type so you can choose the most effective amendments.
How to Improve Clay Soil for Tomatoes
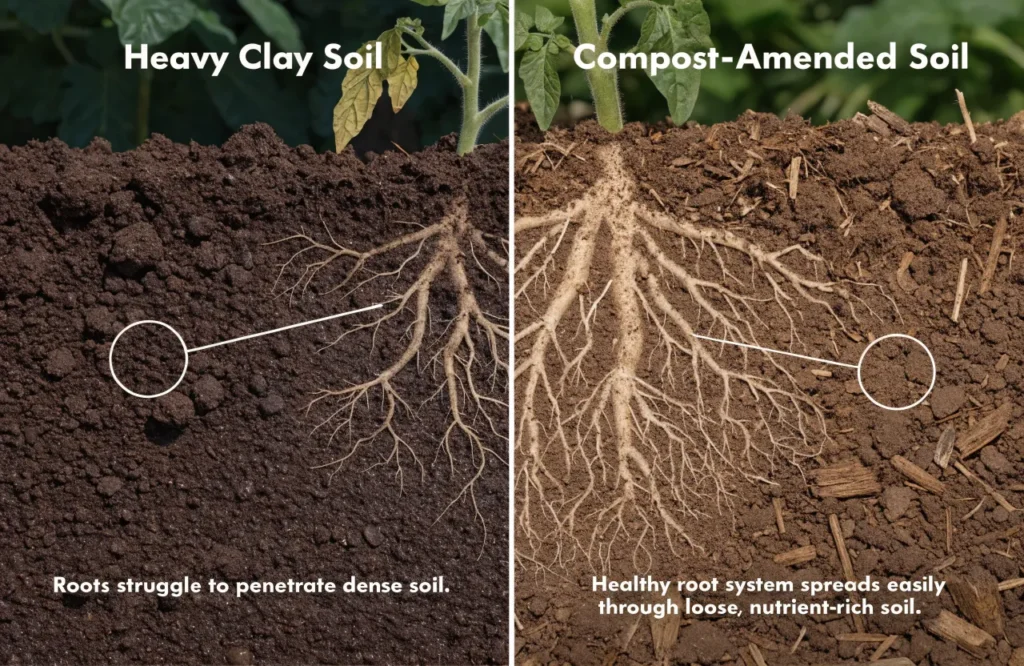
Clay soil contains extremely fine particles that pack tightly together. While it often holds plenty of nutrients, its poor drainage and limited airflow can make it difficult for tomato roots to grow.
Signs You Have Clay Soil
You may have clay soil if:
- Water pools on the surface after rainfall.
- Soil feels sticky when wet.
- It becomes hard and cracked when dry.
- Digging is difficult.
- Tomato plants grow slowly despite regular fertilizing.
Compacted clay restricts oxygen around roots, increasing the risk of root diseases and reducing nutrient uptake.
Add Plenty of Compost
Finished compost is the single best amendment for heavy clay soil.
It helps:
- Break up compacted soil
- Improve drainage
- Increase pore space for oxygen
- Encourage beneficial microbes
- Make soil easier to work
Spread 2–4 inches of compost over the planting area and mix it into the top 8–12 inches of soil before planting.
Improving clay soil is a gradual process. Annual applications of compost continue to enhance soil structure year after year.
Add Organic Matter
In addition to compost, other organic materials improve clay soil over time.
Good choices include:
- Leaf mold
- Well-composted manure
- Shredded leaves
- Aged pine bark
- Homemade compost
These materials create channels within the soil, allowing water and roots to move more freely.
Avoid Adding Sand Alone
One of the most common gardening myths is that adding sand will loosen clay soil.
In reality, mixing small amounts of sand with clay often creates a dense, concrete-like texture that is even more difficult for roots to penetrate.
Instead, focus on adding generous amounts of organic matter. Over time, earthworms and soil microorganisms will naturally improve soil structure.
Pro Tip: Raised beds filled with quality soil are often the easiest solution for gardens with extremely heavy clay.
How to Improve Sandy Soil for Tomatoes
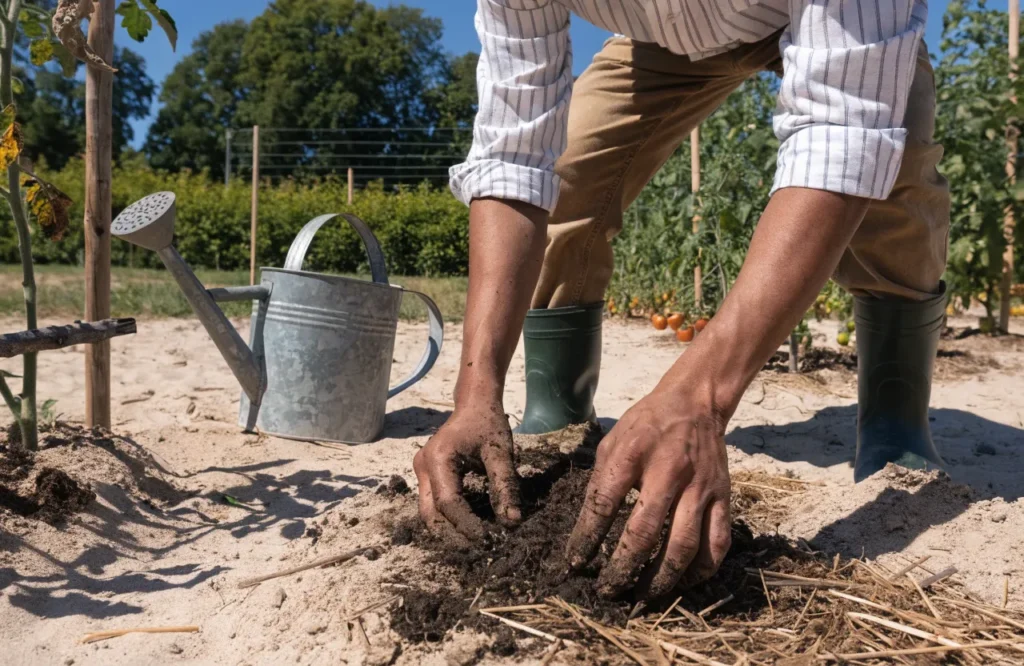
Sandy soil has the opposite problem. It drains quickly and warms up fast in spring, but it struggles to hold water and nutrients.
Tomatoes growing in sandy soil often require more frequent watering and fertilizing unless the soil is improved.
Signs You Have Sandy Soil
Typical characteristics include:
- Water disappears quickly after irrigation.
- Soil feels gritty.
- Plants wilt during hot afternoons.
- Fertilizer washes away after heavy rain.
- Organic matter breaks down rapidly.
Improve Water Retention
Adding organic matter helps sandy soil act like a sponge.
Each season, incorporate:
- Finished compost
- Leaf mold
- Well-aged manure
- Homemade compost
These materials increase both water-holding capacity and nutrient retention.
Add Coco Coir
Coco coir is especially beneficial for sandy soils because it absorbs and stores moisture while maintaining excellent aeration.
Unlike some materials, coco coir does not compact easily, making it ideal for long-term soil improvement.
Use Worm Castings
Worm castings increase microbial activity while supplying slow-release nutrients that remain available longer than many synthetic fertilizers.
Although they won’t completely solve drainage issues, they help sandy soils become more biologically active and fertile.
Apply Organic Mulch
Mulch is particularly valuable in sandy gardens because it slows evaporation and keeps soil temperatures more stable.
Excellent mulch choices include:
- Straw
- Shredded leaves
- Compost
- Pine needles
- Untreated grass clippings (applied in thin layers)
A 2–3 inch layer of mulch can significantly reduce watering frequency during summer.
How to Prepare Garden Soil Before Planting Tomatoes
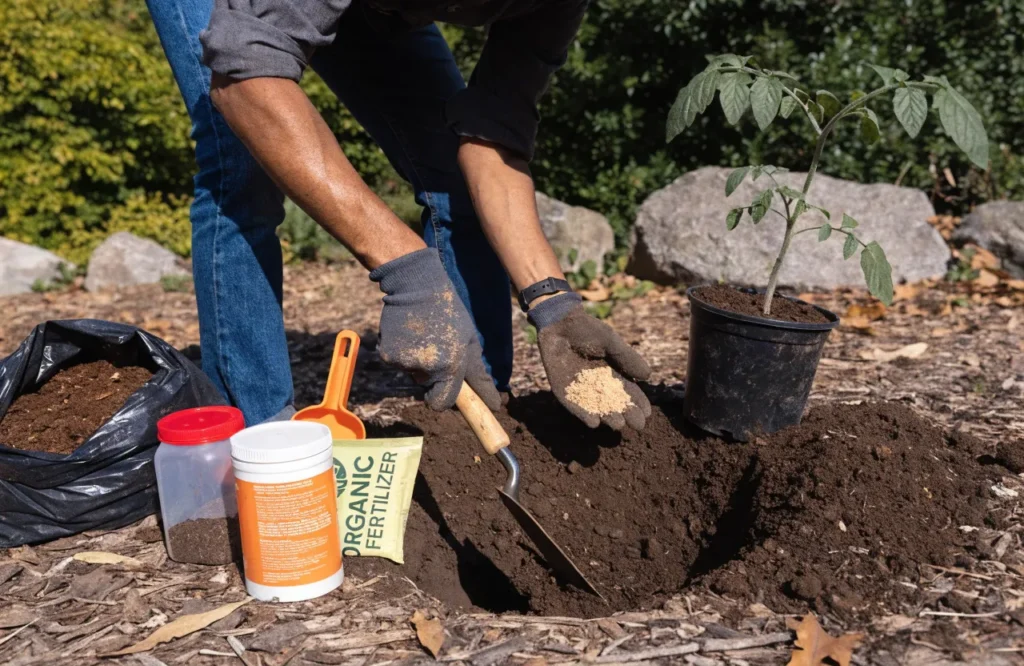
Preparing soil several weeks before planting allows amendments to blend naturally with existing soil and gives beneficial microorganisms time to become active.
Rather than making last-minute changes on planting day, follow a simple preparation schedule.
Four Weeks Before Planting
Begin improving your soil.
Incorporate:
- Finished compost
- Well-aged manure
- Organic soil amendments
- Leaf mold if available
Work these materials into the top 8–12 inches of soil.
This early preparation allows organic matter to begin integrating with native soil before tomatoes are transplanted.
Two Weeks Before Planting
Test your soil.
Check:
- Soil pH
- Organic matter content
- Nutrient levels
- Drainage
If necessary:
- Add lime to raise pH.
- Apply elemental sulfur to lower pH.
- Incorporate additional compost if organic matter is low.
A simple soil test can prevent unnecessary fertilizer applications and identify nutrient imbalances before planting.
Planting Day
When transplanting tomatoes:
Add to each planting hole:
- One to two handfuls of finished compost
- A small amount of worm castings
- Bone meal if phosphorus is needed
- A balanced organic tomato fertilizer (according to label directions)
Mix amendments with the surrounding soil rather than placing concentrated fertilizer directly against the roots, which can cause fertilizer burn.
Water thoroughly after planting to eliminate air pockets and encourage root establishment.
Seasonal Soil Maintenance
Healthy soil improves with consistent care throughout the growing season.
Small maintenance tasks often have a greater long-term impact than large one-time fertilizer applications.
Mulch After Soil Warms
Apply mulch once the soil has warmed in late spring.
Benefits include:
- Conserves moisture
- Suppresses weeds
- Protects soil microbes
- Reduces soil erosion
- Moderates temperature fluctuations
Maintain a mulch layer approximately 2–3 inches deep, keeping it a few inches away from the stem to reduce the risk of stem rot.
Replenish Organic Matter
As the season progresses, organic matter naturally decomposes.
Top-dress plants every few weeks with:
- Finished compost
- Worm castings
- Composted manure
These materials gradually feed both plants and beneficial soil organisms.
Avoid Soil Compaction
Walking repeatedly around tomato plants compresses soil, reducing oxygen around the roots.
Whenever possible:
- Use designated garden paths.
- Avoid working soil when it is very wet.
- Minimize unnecessary tilling.
Healthy soil should remain loose and crumbly throughout the growing season.
Common Tomato Soil Mistakes
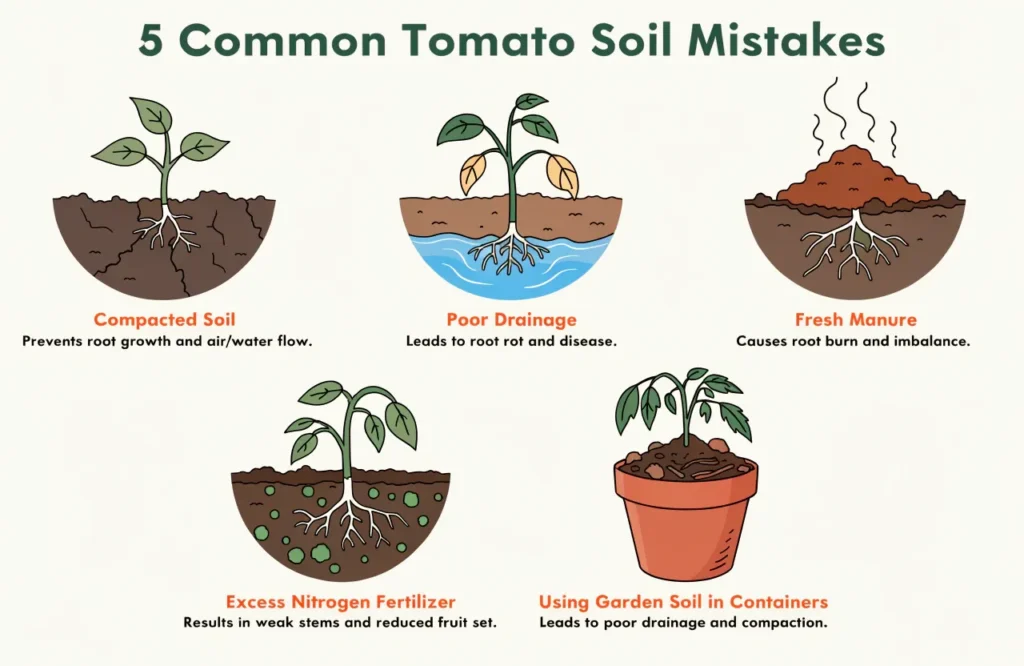
Even experienced gardeners sometimes reduce their harvest through avoidable soil management errors.
Understanding these mistakes can save months of frustration.
Using Garden Soil in Containers
Ordinary garden soil becomes compacted inside pots, restricting drainage and oxygen.
Instead, always use a lightweight potting mix designed for containers.
Growing Tomatoes in the Same Location Every Year
Tomatoes belong to the nightshade family along with peppers, potatoes, and eggplants.
Growing these crops repeatedly in the same location increases:
- Soil-borne diseases
- Pest populations
- Nutrient depletion
Whenever possible, rotate crops every 3–4 years to interrupt disease cycles.
Overusing Nitrogen Fertilizer
Nitrogen promotes vigorous leafy growth, but excessive amounts often reduce flowering and fruit production.
Symptoms include:
- Very dark green leaves
- Thick stems
- Few flowers
- Delayed fruit set
Choose balanced fertilizers formulated for tomatoes and avoid repeated applications of high-nitrogen lawn fertilizers.
Ignoring Drainage Problems
Poor drainage can lead to:
- Root rot
- Yellowing leaves
- Slow growth
- Wilting despite wet soil
If water remains around roots for long periods, improving drainage should be the priority before adding more fertilizer.
Applying Fresh Manure
Fresh manure can:
- Burn roots
- Introduce harmful pathogens
- Add excessive nitrogen
- Encourage lush foliage instead of fruit
Always use manure that has been fully composted.
Skipping Soil Testing
Many nutrient deficiencies are actually caused by improper soil pH rather than a lack of fertilizer.
Testing every few years helps you make informed decisions instead of guessing.
Why Crop Rotation Matters
Crop rotation is one of the simplest ways to maintain healthy garden soil.
Tomatoes, peppers, potatoes, and eggplants share many of the same pests and diseases. Planting them in the same location every year allows these problems to build up in the soil.
Whenever possible:
- Rotate tomatoes with beans or peas.
- Follow tomatoes with leafy greens.
- Avoid planting any nightshade crop in the same bed for at least three years.
Crop rotation also helps balance nutrient use, reducing the risk of soil becoming depleted.
Mulching for Long-Term Soil Health
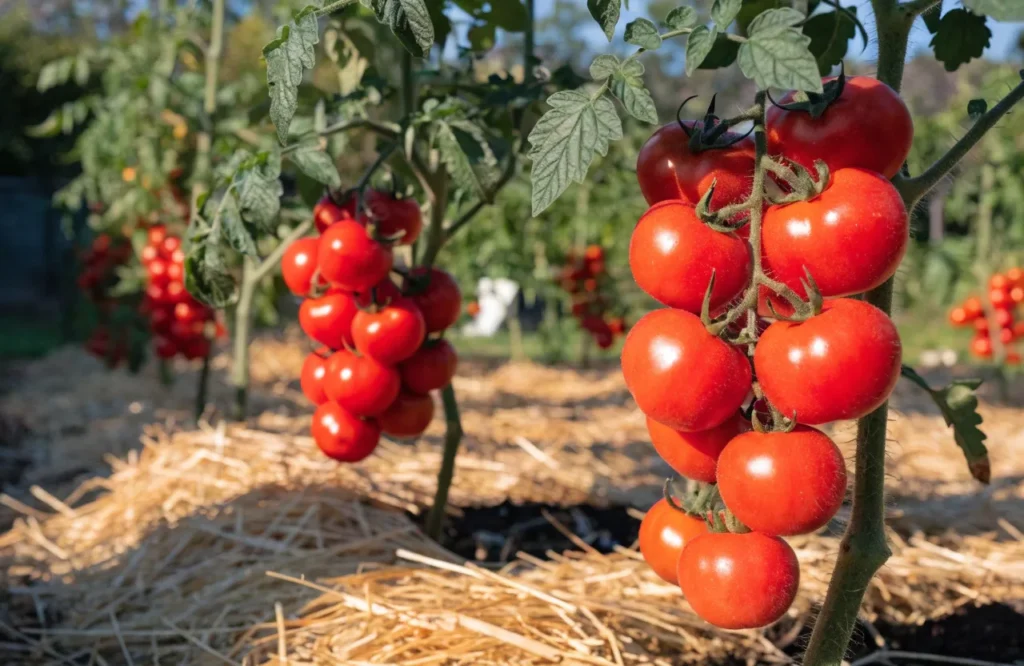
Mulch does much more than reduce weeds.
It gradually breaks down, adding organic matter to the soil while protecting beneficial organisms from extreme temperatures.
The best mulches for tomatoes include:
Straw
Excellent insulation with minimal weed seeds when purchased from a reliable source.
Compost
Provides ongoing nutrition while protecting the soil surface.
Shredded Leaves
An inexpensive mulch that improves soil as it decomposes.
Grass Clippings
Use only untreated clippings and apply them in thin layers to prevent matting.
Healthy Soil vs. Fertilizer: Which Matters More?
Many gardeners assume fertilizer is the solution whenever tomatoes struggle.
In reality, fertilizer is only effective when roots can absorb it.
Healthy soil improves fertilizer performance by:
- Supporting deep root systems
- Increasing microbial activity
- Holding nutrients in the root zone
- Maintaining proper moisture levels
- Improving oxygen availability
Think of fertilizer as a supplement, not a substitute, for healthy soil.
A tomato plant growing in fertile, biologically active soil will usually outperform one receiving frequent fertilizer applications in poor soil.
Expert Tip: Feed the soil first, and the soil will feed your plants. Building healthy soil through compost, organic matter, and proper management creates long-term fertility that benefits every crop, not just tomatoes.
The Perfect Tomato Soil Checklist
Before planting your tomatoes, take a few minutes to evaluate your soil. Healthy tomato plants begin with a healthy growing environment, and a simple checklist can help you identify any improvements that should be made before the season begins.
Your tomato soil should be:
- ✅ Loose and crumbly, not compacted
- ✅ Rich in finished compost or other organic matter
- ✅ Well-draining while retaining consistent moisture
- ✅ Full of beneficial soil organisms
- ✅ Slightly acidic (pH 6.0–6.8)
- ✅ Free of standing water after heavy rain
- ✅ Deep enough for healthy root growth (at least 12–18 inches for in-ground gardens)
- ✅ Improved with seasonal organic matter
- ✅ Covered with mulch after planting
If you can check off most of these items, you’ve created an excellent foundation for healthy, productive tomato plants.
Tomato Soil Comparison Guide
Different growing methods require different soil mixes. Choosing the right combination of ingredients helps maximize plant health and fruit production.
Best Soil Mix by Growing Method
| Growing Method | Best Soil Characteristics | Recommended Mix |
| In-ground garden | Improved native soil with organic matter | Garden soil + compost + aeration materials |
| Raised beds | Rich, loose, well-draining | Topsoil + compost + perlite + coco coir |
| Containers | Lightweight, moisture-retentive | Potting mix + compost + perlite + coco coir |
Recommended Soil Depth
| Growing Method | Recommended Soil Depth |
| Garden beds | 12–18 inches |
| Raised beds | 12 inches or deeper |
| Large containers | 15–20 gallon pots for indeterminate varieties |
Deeper soil allows tomato roots to access more water and nutrients, improving drought tolerance and fruit production.
Best Tomato Soil Ingredients at a Glance
Each ingredient contributes something unique to the growing mix.
| Ingredient | Primary Benefit |
| Compost | Improves fertility, soil life, and structure |
| Worm castings | Gentle nutrients and beneficial microbes |
| Coco coir | Excellent moisture retention |
| Peat moss | Lightweight organic material for moisture retention |
| Perlite | Improves drainage and aeration |
| Pumice | Long-lasting aeration with added weight |
| Bone meal | Supplies phosphorus for root and flower development |
| Kelp meal | Provides trace minerals and natural growth stimulants |
| Gypsum | Supplies calcium without significantly changing soil pH |
| Dolomitic lime | Raises pH while adding calcium and magnesium |
| Organic mulch | Conserves moisture and protects soil biology |
Signs Your Tomato Soil Needs Improvement
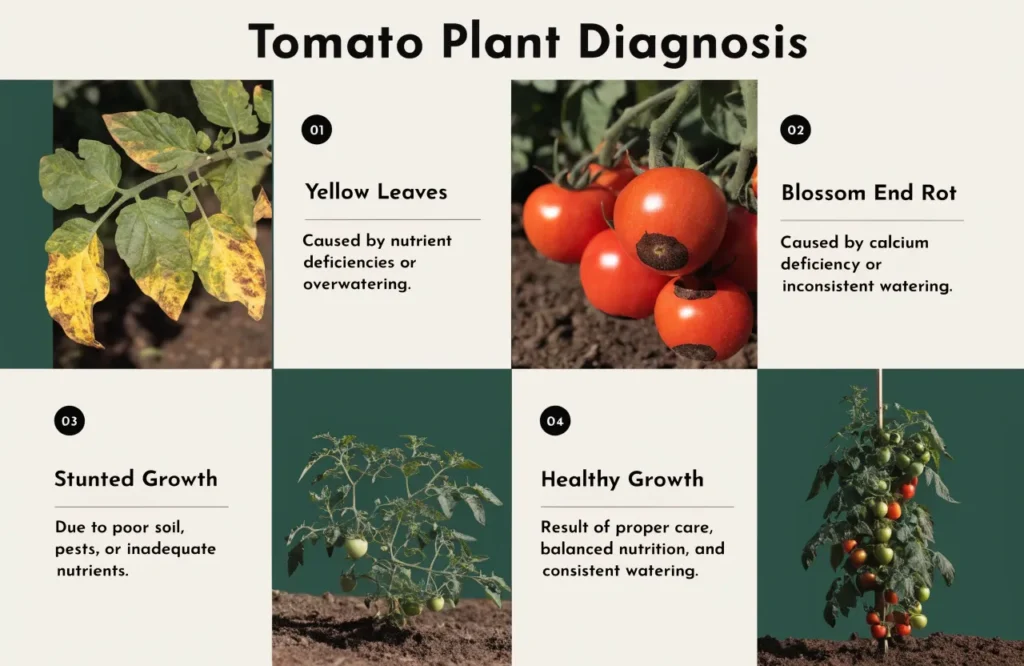
Your tomato plants often reveal soil problems before they become severe. Learning to recognize these warning signs allows you to correct issues early.
Yellow Leaves
Possible causes include:
- Poor drainage
- Nitrogen deficiency
- Incorrect soil pH
- Root stress
If yellowing begins on older leaves, nutrient deficiencies may be involved. If the entire plant appears pale despite fertilizing, test the soil pH before adding more fertilizer.
Yellow leaves are often one of the first indicators that something is wrong with your soil, watering routine, or nutrient balance. Our detailed guide on Why Are My Tomato Plant Leaves Turning Yellow? explains the most common causes and effective solutions.
Slow Plant Growth
Slow-growing tomatoes often indicate:
- Compacted soil
- Cold soil temperatures
- Poor root development
- Low organic matter
- Nutrient deficiencies
Improving soil structure usually produces better long-term results than simply increasing fertilizer applications.
Few Flowers or Fruits
Healthy foliage with very few flowers usually points to:
- Excess nitrogen
- Poor sunlight
- Nutrient imbalance
- Excessively rich soil
Tomatoes need balanced nutrition to shift from vegetative growth to fruit production.
Blossom End Rot
Blossom end rot appears as a dark, sunken patch on the bottom of developing tomatoes.
Although commonly blamed on calcium deficiency, research from the University of California Agriculture and Natural Resources (UC ANR) indicates the disorder is more often caused by inconsistent watering, which disrupts calcium movement within the plant.
To reduce blossom end rot:
- Maintain even soil moisture.
- Apply mulch.
- Avoid letting soil dry out completely.
- Prevent root damage during cultivation.
Wilting Despite Wet Soil
Plants that wilt even though the soil feels wet may have:
- Root rot
- Poor drainage
- Compacted soil
Adding more water usually worsens the problem. Improving drainage should be the priority.
How Often Should You Improve Tomato Soil?
Healthy soil is built gradually rather than all at once.
Before Each Growing Season
Add:
- Finished compost
- Organic matter
- Soil amendments based on test results
Refresh mulch if needed and loosen compacted soil without excessive tilling.
During the Growing Season
Top-dress plants with:
- Compost
- Worm castings
- Organic tomato fertilizer (if needed)
Replace mulch as it decomposes and maintain consistent watering.
At the End of the Season
After harvesting:
- Remove old tomato plants.
- Discard diseased plant material.
- Add compost.
- Plant a cover crop if possible.
Cover crops such as crimson clover, oats, or winter rye help protect soil from erosion while improving fertility for the following season.
Can You Make the Best Soil for Tomatoes Without Expensive Products?
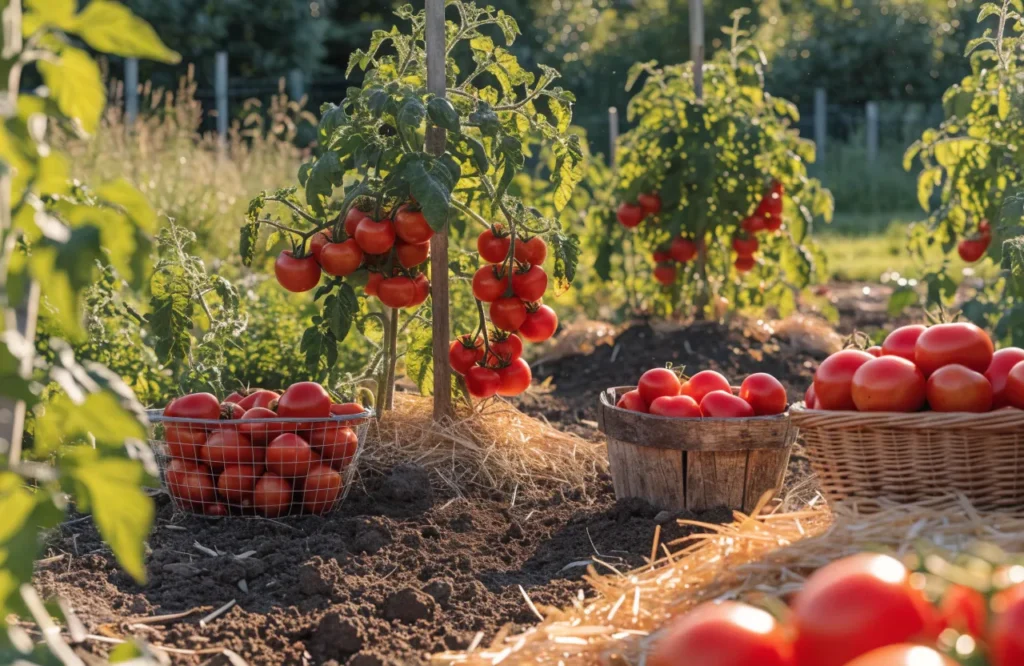
Absolutely.
Many successful gardeners build outstanding soil using inexpensive or homemade materials.
Affordable options include:
- Homemade compost
- Fallen leaves
- Kitchen compost
- Well-aged manure
- Grass clippings
- Worm castings
- Local compost from municipal programs
The goal is not to buy the most expensive products but to create a balanced soil that provides:
- Nutrients
- Airflow
- Moisture retention
- Good drainage
- Healthy microbial life
Healthy soil is developed through consistent improvement over time, not through expensive ingredients.
Frequently Asked Questions
Final Thoughts
The key to growing healthy, productive tomato plants begins beneath the surface. While fertilizers can support growth, they can’t compensate for poor soil. Building nutrient-rich, well-draining soil creates the ideal environment for strong roots, efficient nutrient uptake, and consistent moisture, all of which are essential for abundant harvests.
Whether you’re growing tomatoes in garden beds, raised beds, or containers, choosing the right soil mix makes a significant difference. Combining quality topsoil, finished compost, moisture-retaining materials, and aeration amendments helps create a balanced growing medium that supports vigorous plants from transplanting through harvest.
Paying attention to soil structure, organic matter, and maintaining a slightly acidic pH between 6.0 and 6.8 gives tomato plants the best opportunity to thrive. With proper preparation and ongoing care, your soil will continue to improve each season, producing healthier plants and better-tasting fruit year after year.
Healthy soil is an investment that benefits every crop in your garden. By enriching it with compost, maintaining good drainage, applying mulch, and avoiding compaction, you’ll create a living ecosystem that supports beneficial microorganisms and provides tomatoes with everything they need to flourish.
Start by building the soil first, and your tomato plants will reward you with stronger growth, fewer problems, and a generous harvest of flavorful, homegrown tomatoes throughout the season.
Author’s Note
The recommendations in this guide are based on established horticultural practices, university extension resources, and practical home gardening principles. Because soil composition varies by location, conducting a soil test before making major amendments is the most reliable way to determine your garden’s specific needs.