How to Stake Tomato Plants: 6 Easy Methods, Cages, Stakes & Trellises
Left alone, a tomato plant sprawls across the ground, fine for large-scale field tomatoes, but a problem in a home garden. Fruit touching soil rots faster, dense foliage traps moisture and invites disease, and a sprawling plant eats up far more space than it needs to. Staking, caging, or trellising solves all three problems and makes the plant easier to prune, water, and harvest. Learning how to stake tomato plants properly, rather than just propping up a wobbly stem, is what actually keeps the fruit clean and the plant productive all season.
Table of Contents
Quick Answer: What’s the Best Way to Stake Tomatoes?
The best method depends on the variety. Determinate tomatoes usually do well with a sturdy cage or a 3–4 ft stake, since they stop growing at a set height. Indeterminate tomatoes keep growing all season and need taller, stronger support, a 6–7 ft stake, a twine trellis, or the Florida Weave for a full row.
Why Do Tomato Plants Need Support?
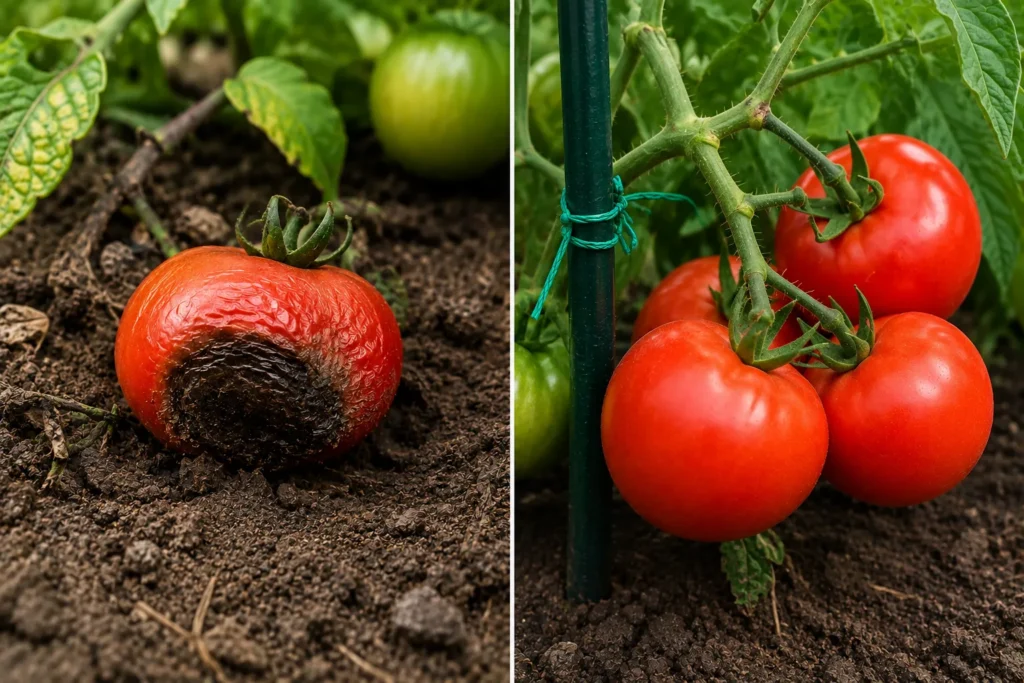
- Cleaner fruit: nothing touches the soil, so there’s less rot and insect damage
- Better airflow: upright plants dry out faster after rain or watering, lowering the risk of common issues covered in our complete guide to tomato plant diseases
- More plants per square foot: vertical growth fits more varieties into the same bed
- Easier maintenance: pruning, watering, and harvesting are faster without a tangle on the ground
- More even fruit development: staked plants are less prone to the calcium-uptake issues behind blossom end rot, since consistent watering is easier to manage on an upright plant
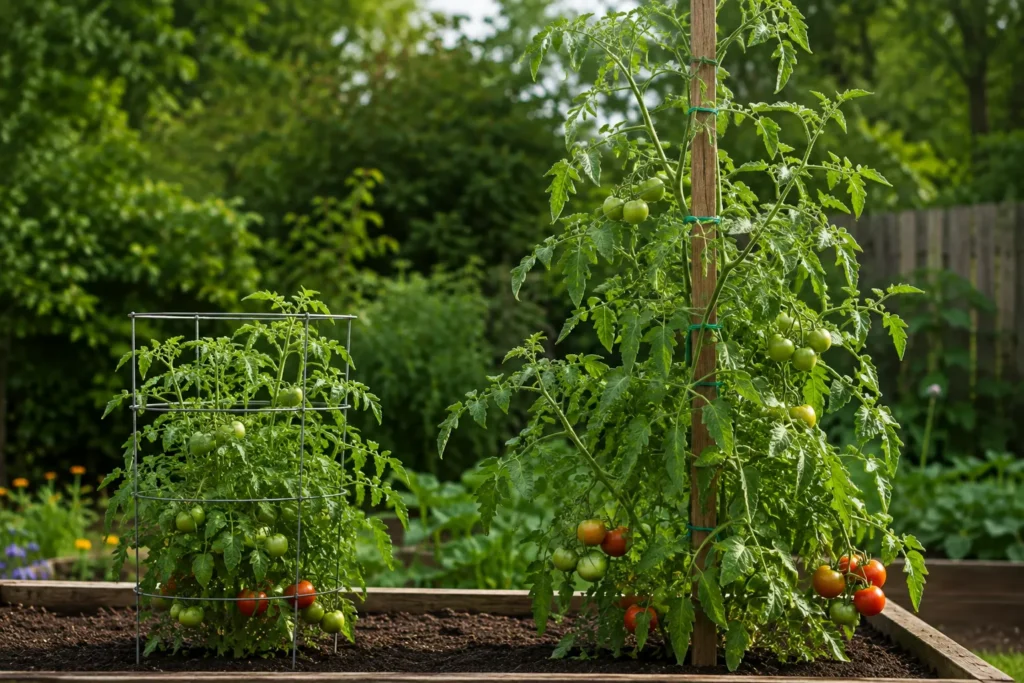
Determinate vs. Indeterminate Tomatoes
| Tomato type | Best support | Typical stake height |
|---|---|---|
| Dwarf | Small cage or stake, or none | 2–3 ft |
| Determinate | Cage or sturdy stake | 3–4 ft |
| Indeterminate | Tall stake, trellis, or Florida Weave | 6–8+ ft |
| Container tomato | Cage or teepee | 3–6 ft |
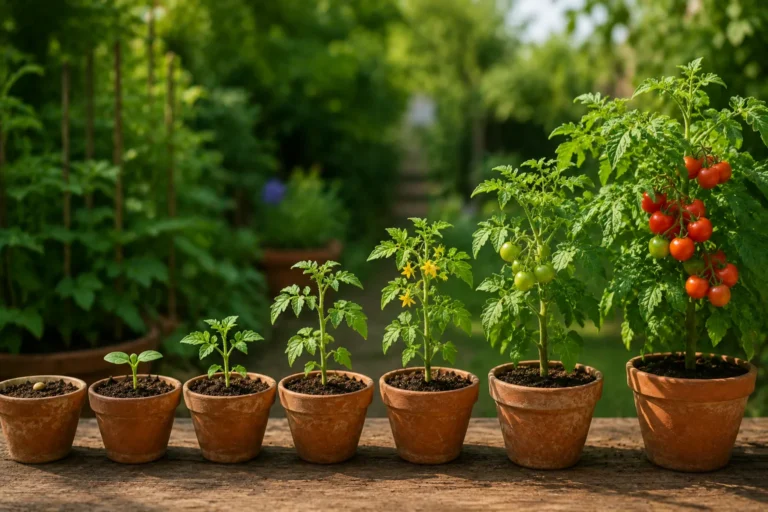
Not sure which type you have? Check the seed packet or plant tag, it’s almost always listed. Staking works best when timed with the plant’s actual growth stage rather than the calendar, so it’s worth cross-checking where your plant is in its development before you commit to a support method.
6 Best Tomato Staking Methods
1. Single Stake
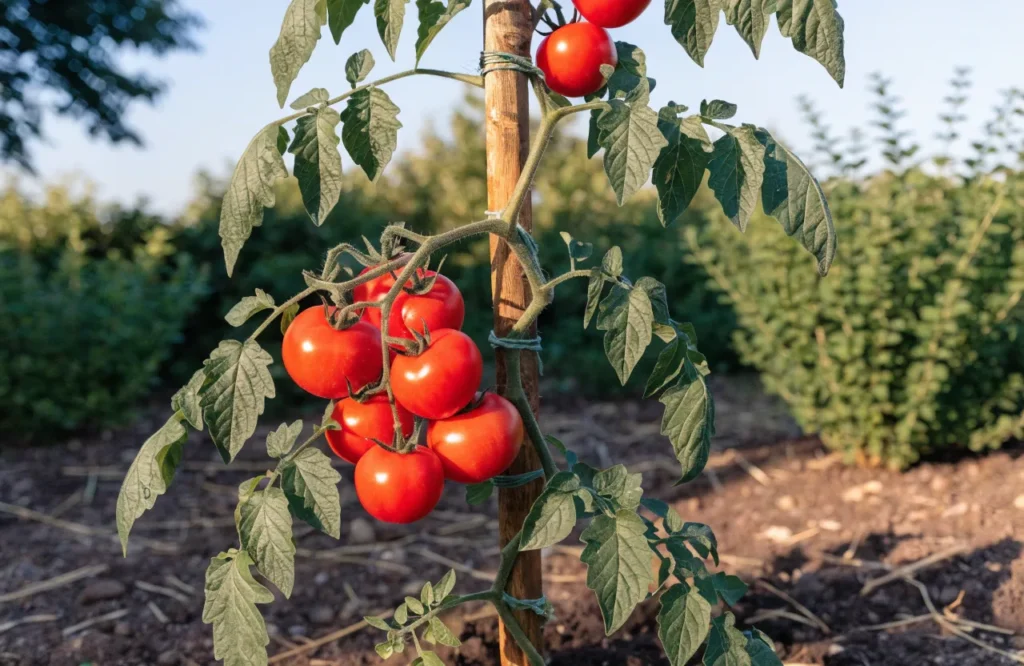
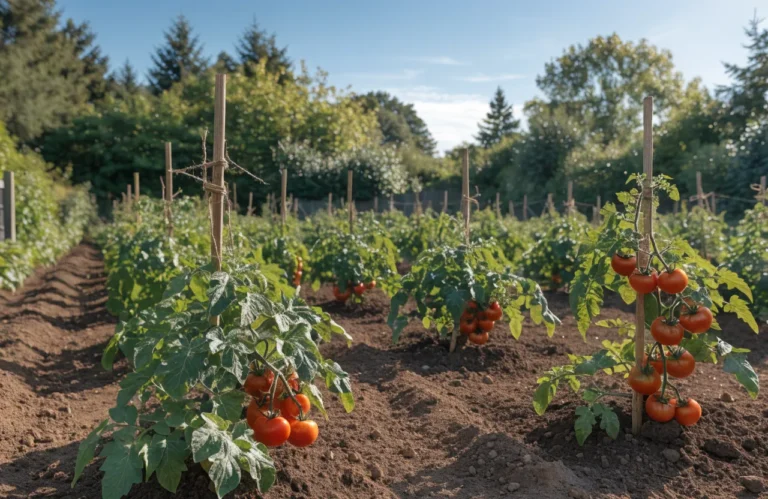
Drive one sturdy stake into the ground next to the plant, then tie the main stem to it as the plant grows, adding a new tie every 6–8 inches. Growers using this method almost always prune to a single main stem, pinching off suckers so all the plant’s energy goes into one strong leader rather than several competing stems.
- Best for: Indeterminate varieties where you want tight control over size and airflow
- Materials: One 6–7 ft stake per plant, soft twine
- Pros: Cheapest method, takes up the least space per plant, easiest to inspect and harvest from
- Cons: Requires weekly tying and pruning; a single tie point puts more strain on the stem in wind
2. Tomato Cage
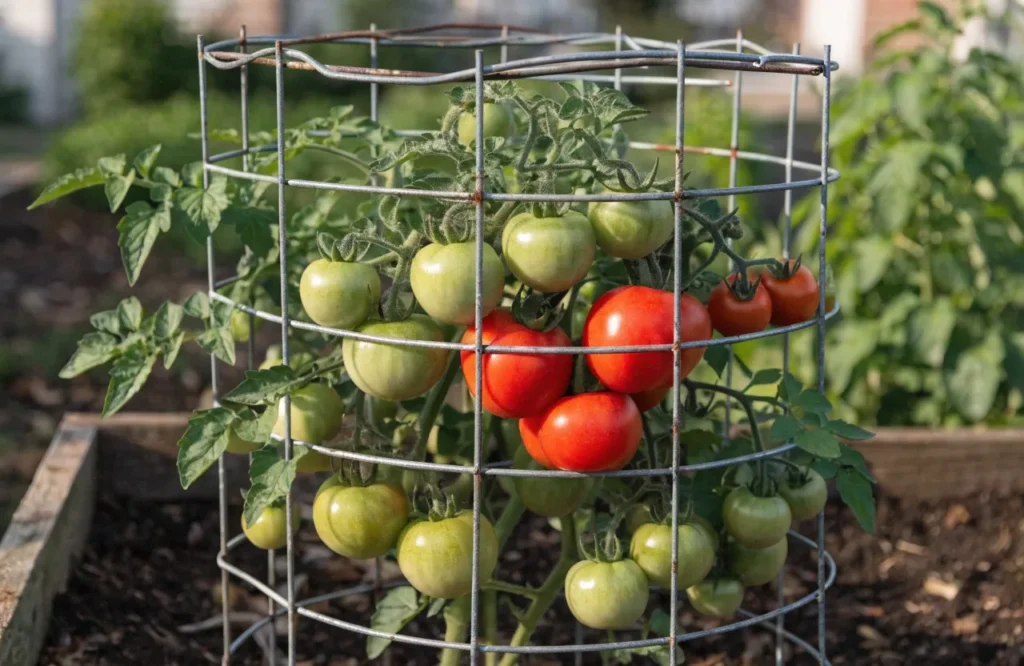
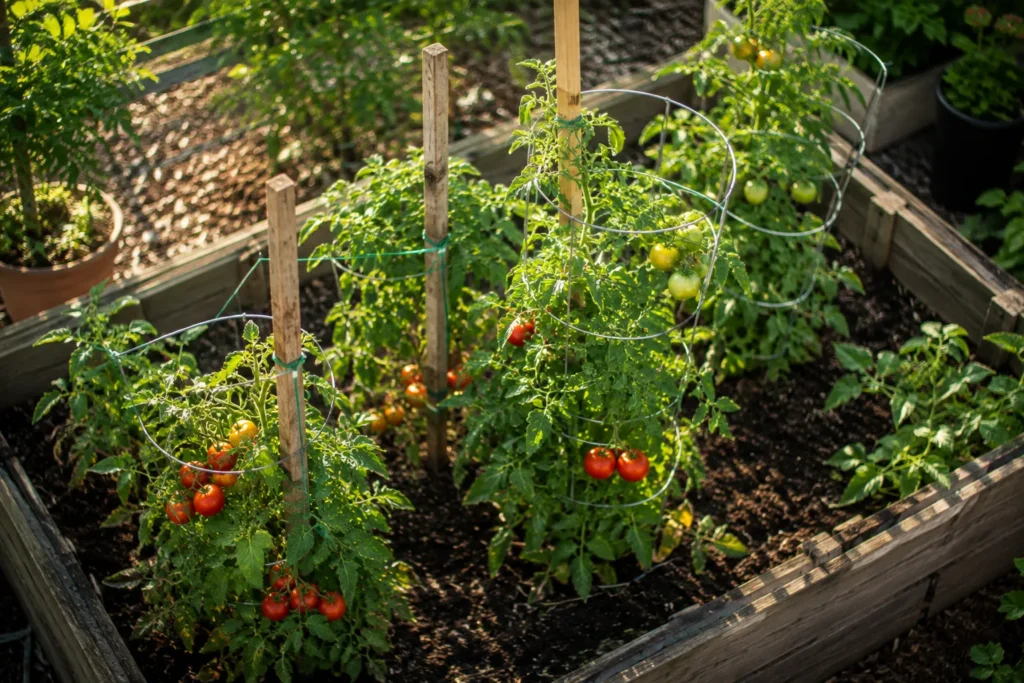
Set a cylindrical wire frame over the plant while it’s still small, and let the plant grow up through it, with foliage resting against the wire as support. Because a cage supports the plant from multiple sides, growers typically allow 3–4 main stems instead of pruning to one.
- Best for: Determinate types, or gardeners who want a lower-maintenance option
- Materials: A cage tall and wide enough for the variety (store-bought cages are often undersized for indeterminate tomatoes, many growers build their own from concrete reinforcing wire or cattle panel, cut into a 4–5 ft cylinder)
- Pros: Minimal tying, minimal pruning, supports heavy fruit loads well
- Cons: Store-bought cages rarely fit full-season indeterminate plants; DIY cages take upfront effort to build
3. Florida Weave
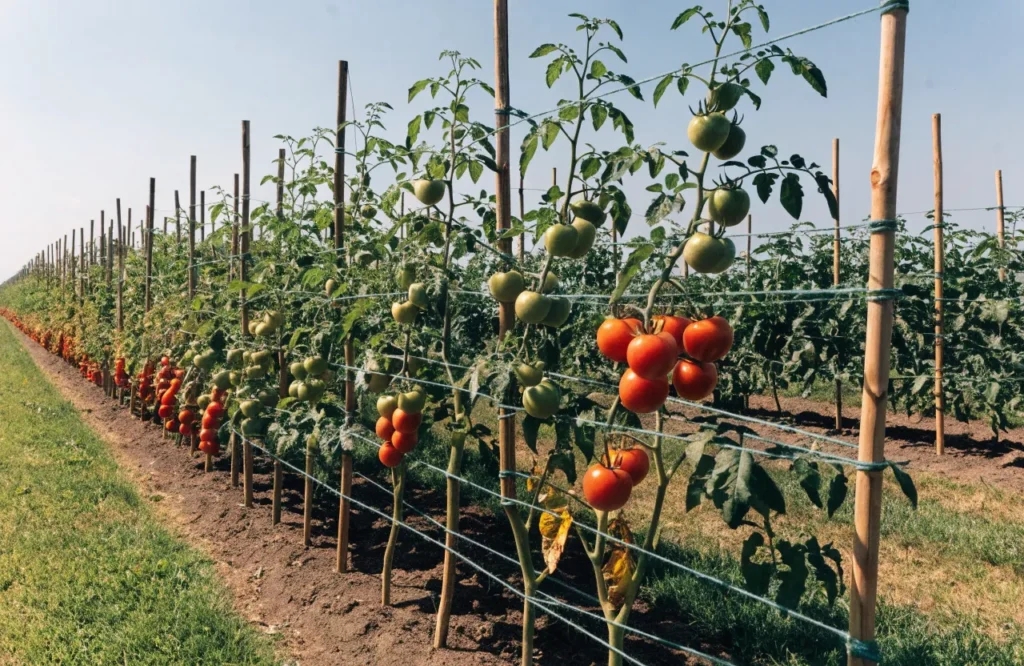
Drive a stake at each end of the row plus one every 2–3 plants down the line. Starting at one end, weave a length of twine horizontally in front of one plant and behind the next, continuing to the far stake, then work back down the other side of the row. Add a new row of weaving every 8–12 inches as the plants get taller.
- Best for: Long rows of tomatoes, market gardens, raised beds, or anyone growing many plants of the same row spacing
- Materials: Stakes at row ends and every 2–3 plants, a large spool of twine
- Pros: Fast to install for many plants at once, low material cost per plant, sturdy once several rows are woven
- Cons: Not practical for just one or two plants; requires careful, consistent tension to work well
4. Twine Trellis (A-Frame)
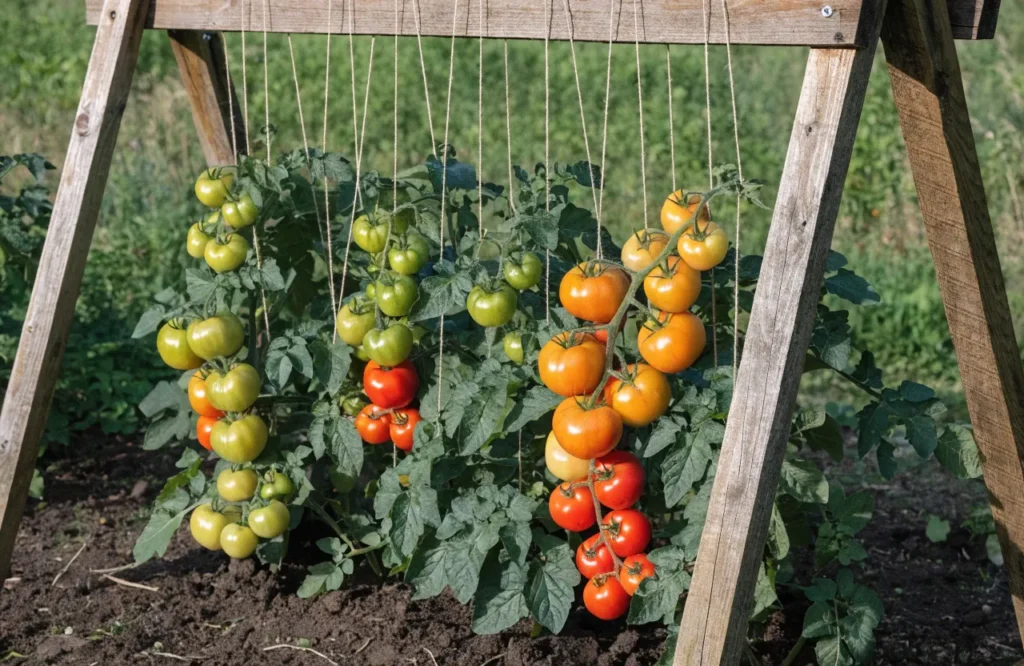
Build two A-frames from bamboo or lumber at either end of the row, then run a horizontal bar between them at roughly 6 ft high. Hang individual lengths of twine down from the bar to each plant, and as the plant grows, gently wind or clip the stem around its twine, this is the method used in commercial tomato greenhouses.
- Best for: Dense plantings where you want to fit many varieties into a small footprint, or gardeners who like a tidy, uniform look
- Materials: Bamboo or lumber for the A-frame, a horizontal crossbar, one length of twine per plant
- Pros: The most space-efficient method, plants can be spaced closer together than with cages or stakes
- Cons: More setup work upfront; needs a stable, well-anchored frame since it’s carrying the weight of the whole row
5. Tomato Arch
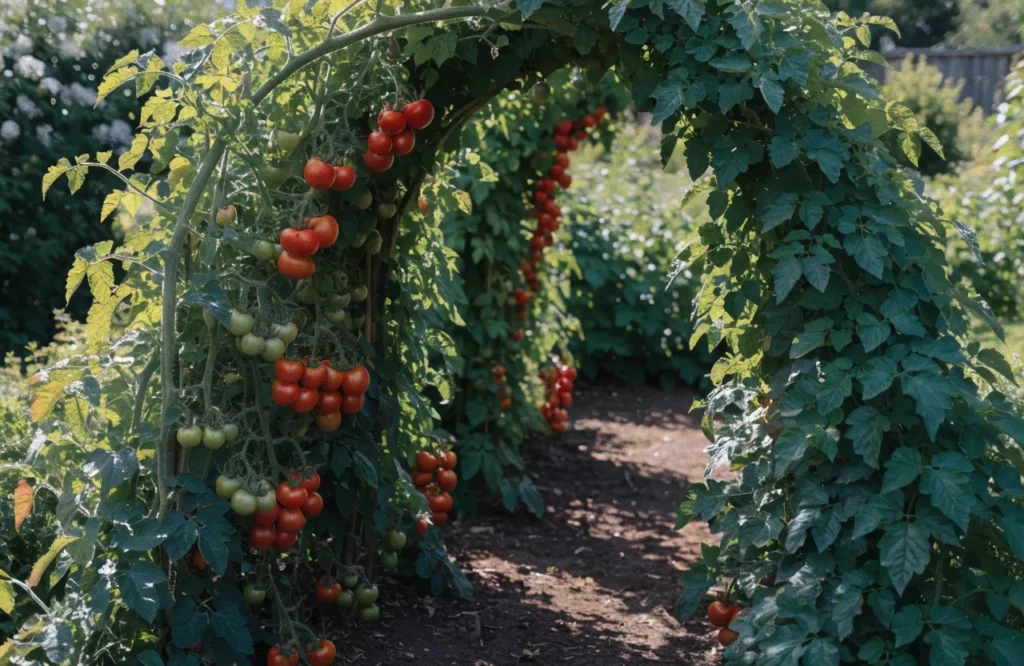
If you already have (or want to add) a garden arch, train an indeterminate vine up one side as it grows, over the top, and down the other side, tying it to the arch structure as needed along the way.
- Best for: Ornamental or mixed beds where you want the tomato plant to double as a garden feature
- Materials: A garden arch, soft twine or plant clips
- Pros: Visually striking, makes use of vertical space you may already have
- Cons: Only works for a single vigorous indeterminate plant per arch; less practical if you’re growing many varieties
6. Teepee (3-Stake)
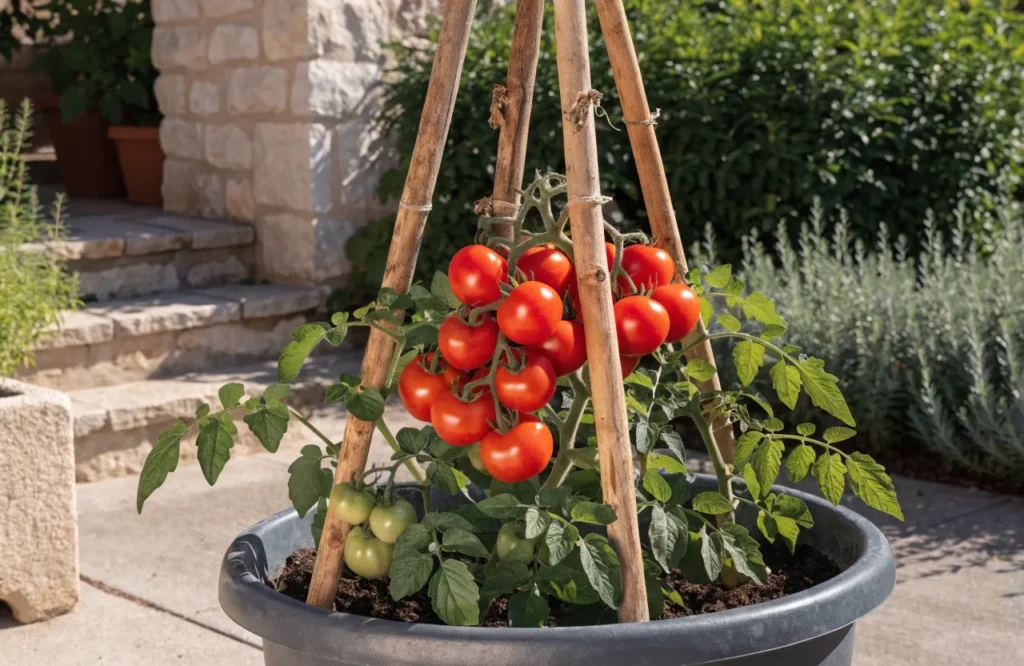
Push three or four stakes into the ground around the plant in a circle, angled inward, and lash them together at the top where they cross. Tie the plant to the nearest stake as it grows.
- Best for: Containers, patios, or anywhere you can’t drive a single stake straight down (like a straw-bale bed or a spot with buried irrigation lines)
- Materials: 3–4 stakes (bamboo works well), twine to lash the top and tie the plant
- Pros: Very stable due to the wide base, works in containers where a single stake would tip
- Cons: Takes up more lateral space than a single stake; needs more material per plant than a basic stake setup
Tomato Cages vs Stakes: Which Is Better?
Cages are lower-effort, less tying, less pruning, and a good fit if you’d rather not manage suckers weekly. Stakes take more maintenance but give you tighter control over plant size and airflow, and they take up less space per plant, which matters if you’re growing many varieties in a small bed. If you’re weighing the two, how to stake tomato plants versus caging them really comes down to how much weekly upkeep you want: determinate tomatoes generally do better in cages, while indeterminate tomatoes often do better staked, trellised, or Florida-Weaved, simply because a cage large enough for a full-season indeterminate plant is hard to find and expensive to buy.
Best Tomato Stakes and Materials
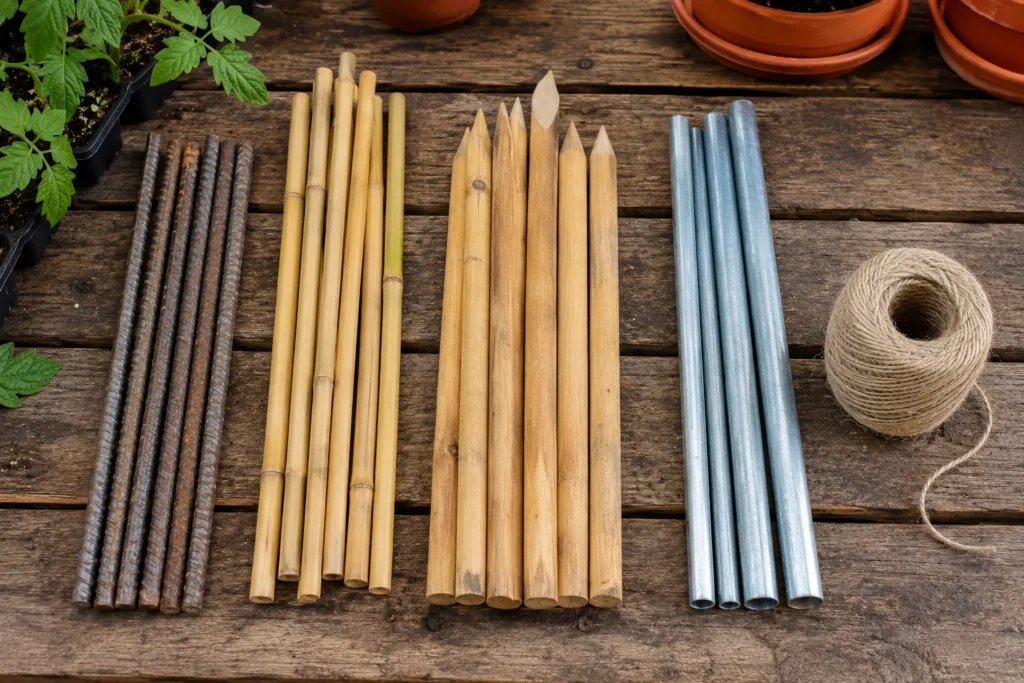
| Material | Pros | Cons |
|---|---|---|
| Iron rebar | Long-lasting, thin enough to push in by hand, weathers to a natural brown | Slightly higher upfront cost |
| Iron T-bar | Extremely sturdy | Requires hammering in |
| Bamboo | Attractive, inexpensive, reusable | Eventually rots |
| Untreated lumber (1×2, 2×2) | Cheap, easy to cut to size | Rots faster than bamboo or metal |
| Metal pipe/conduit | Very sturdy, long lifespan | Heavier, higher cost |
| Concrete reinforcing wire (DIY cages) | Extremely durable — can last 15+ years | Labor-intensive to bend |
Avoid thin, plastic-coated stakes, they bend under fruit weight and degrade in sunlight. Avoid chemically treated wood too, since runoff can leach into soil around edible plants. For ties, use a soft natural-fiber twine like jute or sisal, it composts at season’s end and won’t cut into the stem.
How to Stake Tomato Plants: Step-by-Step
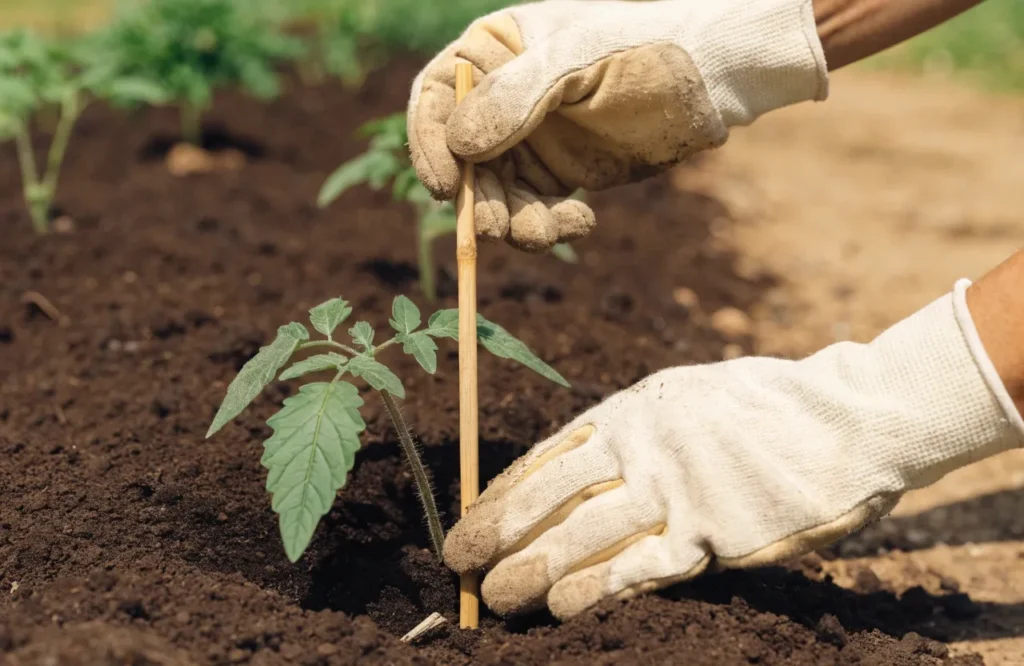
- Install the stake or cage early, right after transplanting or within the first 1–2 weeks to, avoid damaging roots later.
- Push stakes 8–12 inches into the ground, positioned 4–6 inches from the stem.
- Settle cages over the plant while it’s still small, and make sure it’s growing in soil suited to root development, see our guide to the best soil for tomatoes if you’re setting up a new bed.
- Anchor cages to a driven stake if your garden is windy, an unanchored cage can tip once the plant fills out.
- Check plants weekly and tie the main stem every 6–8 inches using a loose figure-eight loop (stake on one side, stem on the other) so growth isn’t crushed.
- When a plant outgrows its stake, add a taller one or bend the leading stem over and let a lower side-shoot become the new leader.
When Should You Stake Tomato Plants?
As early as possible, ideally at transplanting, while roots are still shallow and easy to work around. Waiting until the plant is sprawling risks damaging both roots and stems when you finally add support. Knowing how to stake tomato plants early also makes it easier to train the stems before they become too large or difficult to handle.
How to Tie Tomato Plants Without Damaging the Stems
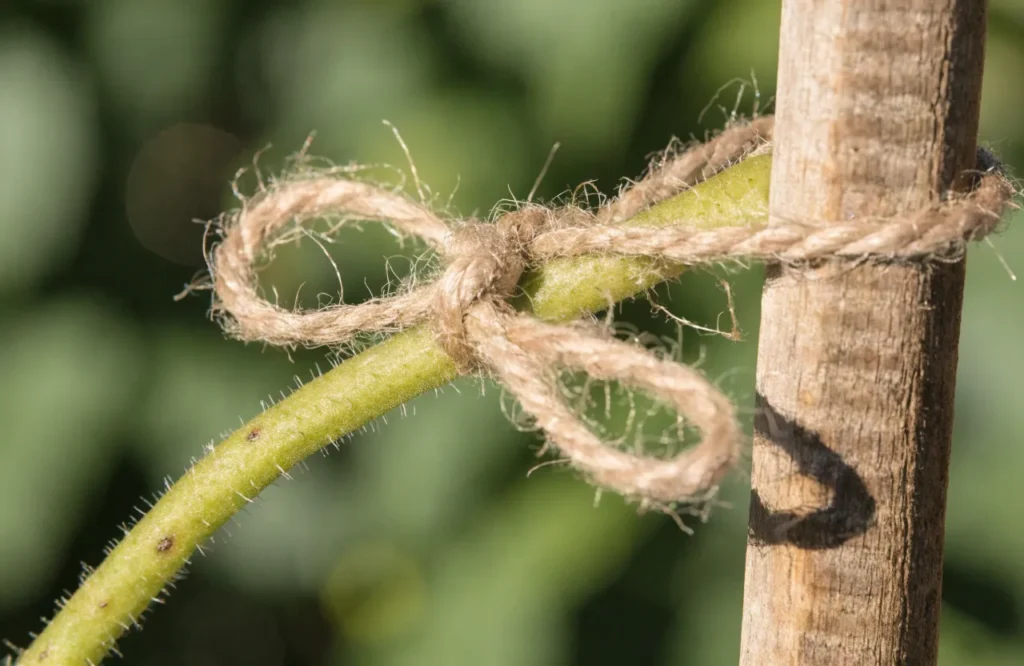
Use a loose figure-eight: loop the twine around the stake, then around the stem, without cinching it tight. As the stem thickens through the season, a tight tie can girdle it. Soft jute or sisal is standard; strips cut from old pantyhose or soft plastic bags also work, since both stretch instead of cutting in.
Should You Prune Tomatoes When Staking Them?
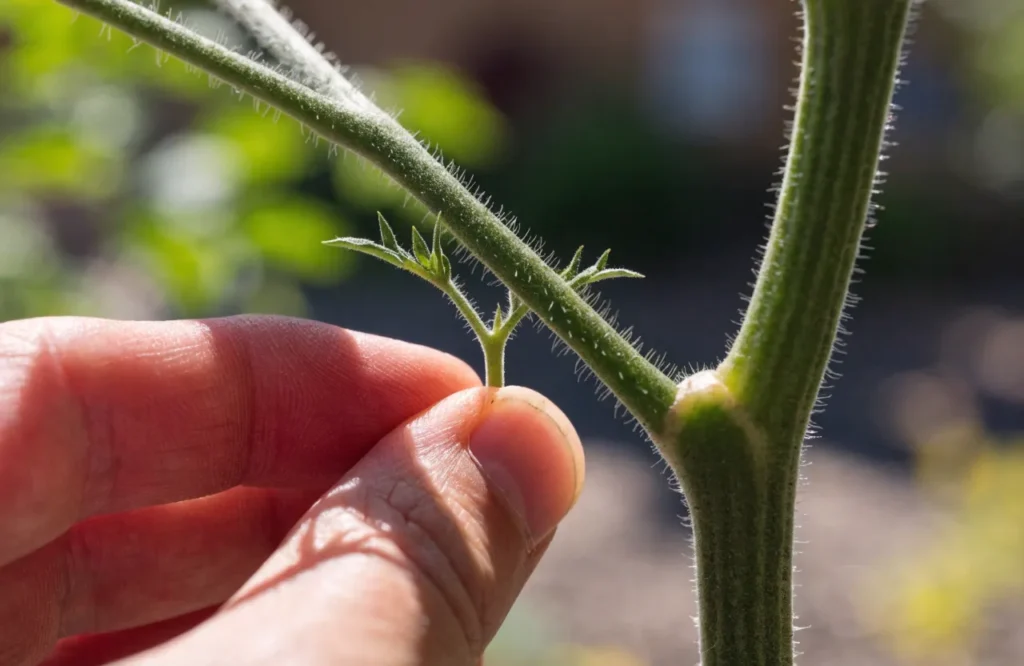
Most staked tomatoes benefit from removing some suckers, the shoots that sprout in the “V” between the main stem and a branch. Pruning isn’t primarily about “saving energy” for fruit, since suckers do photosynthesize and can flower and fruit themselves; it’s mainly about controlling the plant’s size, keeping it manageable on its support, and improving airflow to reduce disease risk. For the full method, see how to prune tomato plants in 7 simple steps. Single-stem pruning is standard with stake and twine methods; cage-grown plants can usually carry 3–4 stems since there’s more room.
Special Situations
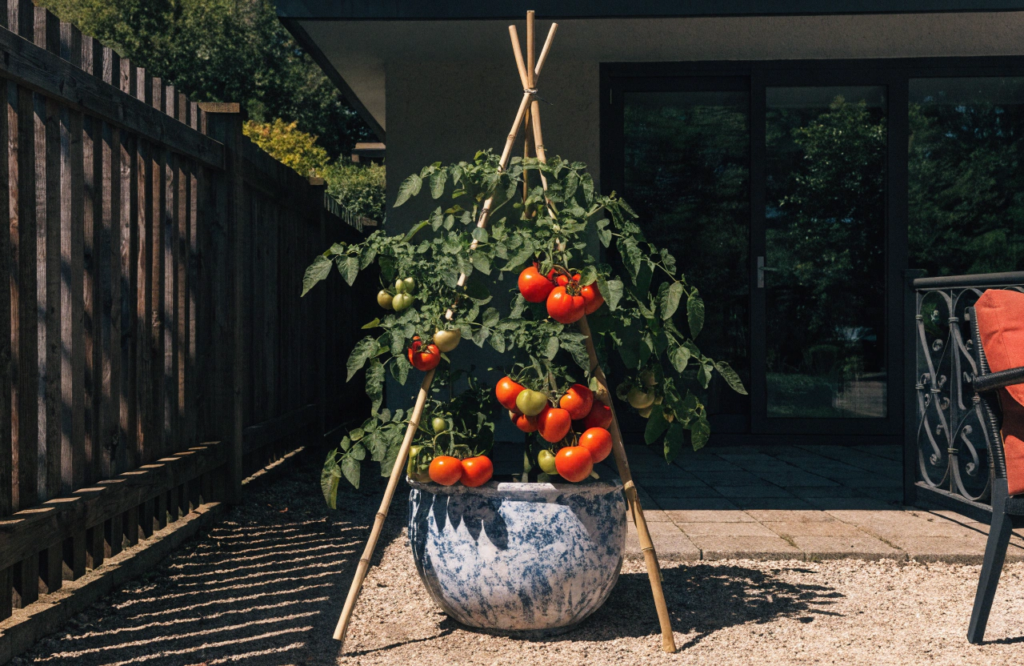
Containers: Dwarf varieties usually need no support. Determinate varieties do best with a cage rather than a single stake, since the wider base resists tipping. When learning how to stake tomato plants in containers, keep plants on the shorter side to avoid the pot blowing over. For a full container setup, see our beginner’s guide to growing tomatoes in pots.
Straw bales: Bales compress and shift as they break down over the season, so a stake that feels solid in spring can loosen by midsummer. Drive stakes deep enough to pass through the bale into the soil beneath, or use a wide-based teepee.
Raised beds: Stakes anchor well in loose raised-bed soil, but drive them close to the box’s edge or frame for extra stability against wind.
Windy gardens: Favor cages anchored to a driven stake, or the Florida Weave, over single unsupported stakes, both distribute wind load better than one point of contact.
Common Tomato Staking Mistakes
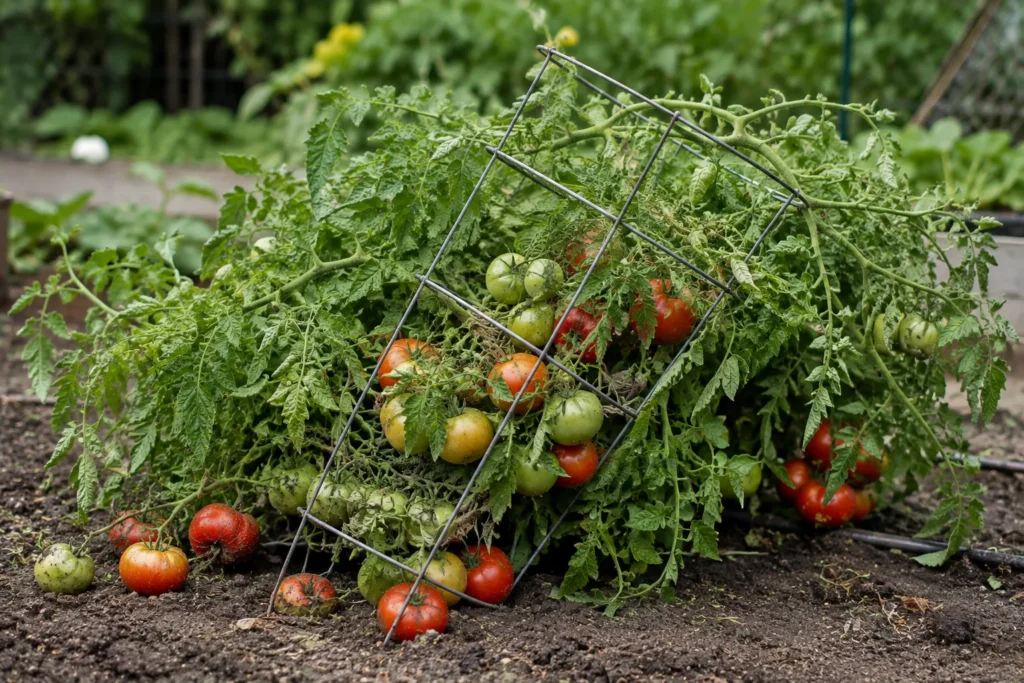
- Staking too late, after the plant has already sprawled
- Using a cage too small for an indeterminate variety
- Tying too tightly, which girdles the stem as it thickens
- Skipping weekly checks, so suckers and ties fall behind
- Using chemically treated wood near edible plants
These mistakes can make even a good support system less effective, so learning how to stake tomato plants correctly from the start can save you problems later in the season.
Frequently Asked Questions
How often should I prune and tie my tomato plants?
Check weekly during active growth. Suckers are easiest to remove while small; missing a week occasionally isn’t a disaster, but don’t let them get too far ahead. Tie the main stem every 6–8 inches as it grows.
What’s the best height for a tomato stake?
It depends on the variety. Dwarf types need 2–3 ft, determinate types need 3–4 ft, indeterminate varieties need 6–8+ ft stakes, and container tomatoes need 3–6 ft.
Should I use one stem or several?
Most staked tomatoes benefit from removing some suckers. Single-stem pruning is standard with stake and twine methods; cage-grown plants can usually carry more stems since the cage supports the extra weight.
When should you stake tomato plants?
As early as possible, ideally at transplanting, while roots are still shallow and easy to work around. Staking too late—after the plant has already sprawled—is one of the most common mistakes.
Do all tomatoes need staking?
No. Dwarf varieties usually need no support. Determinate varieties do best with a cage rather than a single stake. Indeterminate varieties need the tallest, sturdiest support since they keep growing all season.
Final Thoughts
There’s no single “correct” way to stake tomato plants, the right method depends on your variety, your space, and how much weekly maintenance you want to take on. Once you know how to stake tomato plants using the right method for your variety, match the support to the plant type in the table above, install it early, and check in weekly, and the rest is upkeep rather than guesswork.
Once your plants are staked and growing well, round out your care routine with our guides to the best fertilizer for tomatoes and the best tomato companion plants to plant alongside them.