How to Plant Spring Bulbs: Depth, Spacing & Timing
Learning how to plant spring bulbs is one of the easiest ways to bring reliable color to the garden after winter. It takes an afternoon in fall, and daffodils, tulips, crocuses and alliums do the rest. This guide shows you how to plant spring bulbs step by step, including exactly how deep and how far apart to plant each bulb, what to do in different soils, how to protect bulbs from squirrels, and what to do if you’re late.
Quick Answer:
Most spring-flowering bulbs are planted in fall, once the soil has cooled to about 15°C (60°F) or below. The exact timing depends on your climate and the bulb. Choose a sunny spot with free-draining soil, dig a hole two to three times as deep as the bulb is tall, and set the bulb in pointed end up. Cover it with soil and water once. After flowering, leave the foliage until it turns yellow so the bulb can recharge.
Table of Contents
When to Plant Spring Bulbs
Timing is the first step in learning how to plant spring bulbs well. Spring bulbs need a spell of cold to trigger flowers, and they need time to root before the ground freezes. That’s why they go in during fall. In cooler climates, that puts bulb planting in the same window as the other flowers to plant in September and the rest of your September planting jobs, so it’s easy to tackle them all in one weekend.
Use soil temperature as your signal. Plant when the soil at planting depth has cooled to about 15°C (60°F) or below, which usually happens after a couple of weeks of cool nights. Planting too early in warm soil can encourage premature growth and disease.
Plant in this order if you want to stagger the work: daffodils, alliums, crocuses and snowdrops first, then hyacinths, and tulips last. Tulips do best planted later, which also lowers the risk of tulip fire disease.
How late is too late? Not very. Hardy bulbs can go in any time the ground is workable, meaning not frozen or waterlogged, including December and January in many areas. Late-planted bulbs may flower later and slightly smaller in the first year, but that beats leaving them in the bag. Bulbs won’t keep until next year.
Spring Bulb Planting Times by Climate
| Region | Best planting window | Notes |
|---|---|---|
| UK, Ireland, northern Europe | September–October (daffodils, alliums, crocus, hyacinths, muscari); October–November (tulips) | Later tulip planting reduces the risk of tulip fire |
| Cold US/Canada (zones 3–5) | Late September to mid-October | Aim for 6–8 weeks before the ground freezes |
| Mid US (zones 6–7) | October to early November | Wait until soil temperatures drop |
| Warm US (zones 8–9) | November to December, after pre-chilling | Tulips and hyacinths need refrigerating first |
| Hot climates (zone 10+) | Late December to January, after pre-chilling | Tulips often perform as annuals |
| Cold-winter highlands, including northern Pakistan and Himalayan foothills | October to November, before the ground freezes | Treat as a cold climate and check your local winter lows |
| Warm-winter regions, including the plains of South Asia | November to December, after pre-chilling | See the note below |
| Southern Hemisphere | April to June | Chill bulbs first in mild regions |
Warm-winter climates, including parts of South Asia: Tulips, hyacinths and some other spring bulbs may need pre-chilling before planting. Follow your bulb supplier’s recommended chilling period and plant according to local winter temperatures. Daffodils and paperwhite narcissus generally cope better with mild winters than tulips do.
How to pre-chill bulbs: Store them in a paper bag in the refrigerator’s vegetable drawer. Most bulbs need roughly 6–10 weeks, and tulips can need 12–14, so check the label. Keep them away from apples, pears and other ripening fruit, because the ethylene gas they give off can damage the flower inside the bulb.
What You’ll Need
Here’s the short kit list for how to plant spring bulbs the easy way:
- Spring bulbs (firm, healthy, full-sized)
- A trowel, or a long-handled bulb planter for larger quantities
- A spade, for planting in drifts
- Grit or coarse sand for heavy soil
- Compost or leaf mold
- Labels or markers
- Chicken wire or bulb cages, if squirrels are a problem
- Pots with drainage holes and free-draining potting mix, for containers
How to Choose Healthy Bulbs
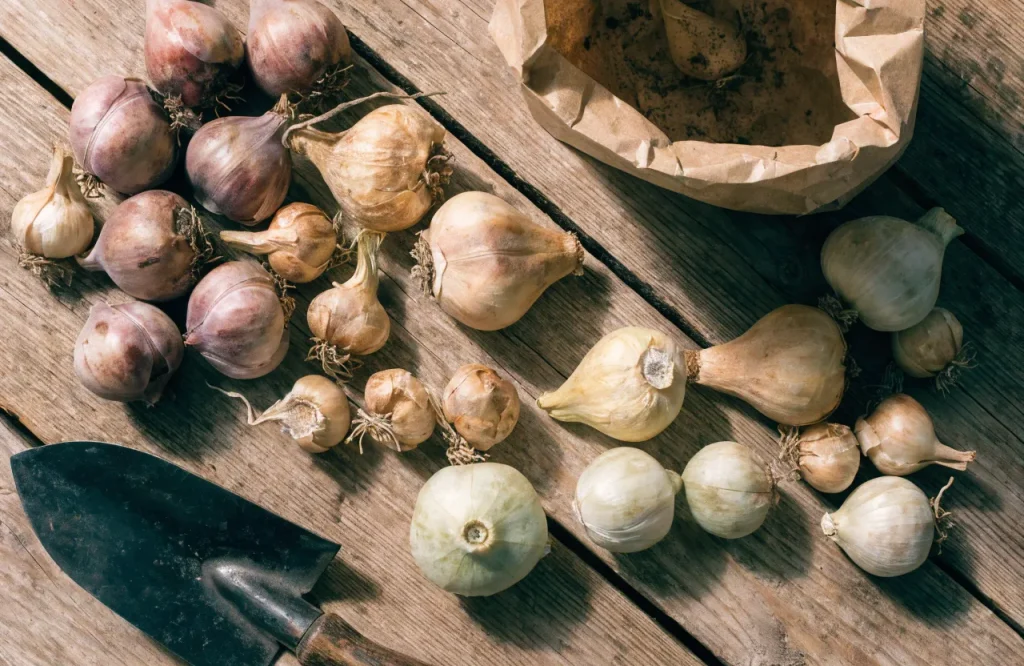
Size matters, because the bulb holds everything the flower needs. Look for:
- Bulbs that feel heavy and firm, not soft, spongy or light
- No mold, blue-green fungus, or deep bruising
- Little or no sprouting (lilies are the exception, as they keep fleshy roots)
- The largest grade you can afford, since bigger bulbs give bigger, sturdier flowers
Store them properly until planting day. Keep bulbs somewhere cool, dry and ventilated, such as a garage or shed, in paper bags, mesh bags or an open box. Never keep them in sealed plastic, which traps moisture and causes rot.
Do you need to soak bulbs first? Generally no. Most bulbs go into the ground dry. The main exception is anemone blanda corms, which are shriveled and can be soaked for a few hours to plump them up.
Where to Plant Spring Bulbs
Location matters as much as technique in how to plant spring bulbs, because drainage decides whether they thrive or rot.
- Sun: Full sun to partial shade is ideal. Early bloomers such as crocuses, daffodils and snowdrops do well under deciduous trees, because they flower and gather light before the tree leafs out.
- Drainage: This matters most. Bulbs sitting in cold, waterlogged soil will rot. If water pools after rain, plant in a raised bed or mound, or use containers.
- Soil: Loamy or slightly sandy soil with a pH between about 6 and 7 is ideal. In heavy clay, mix in grit and compost to open up the soil.
How to Plant Spring Bulbs in the Ground
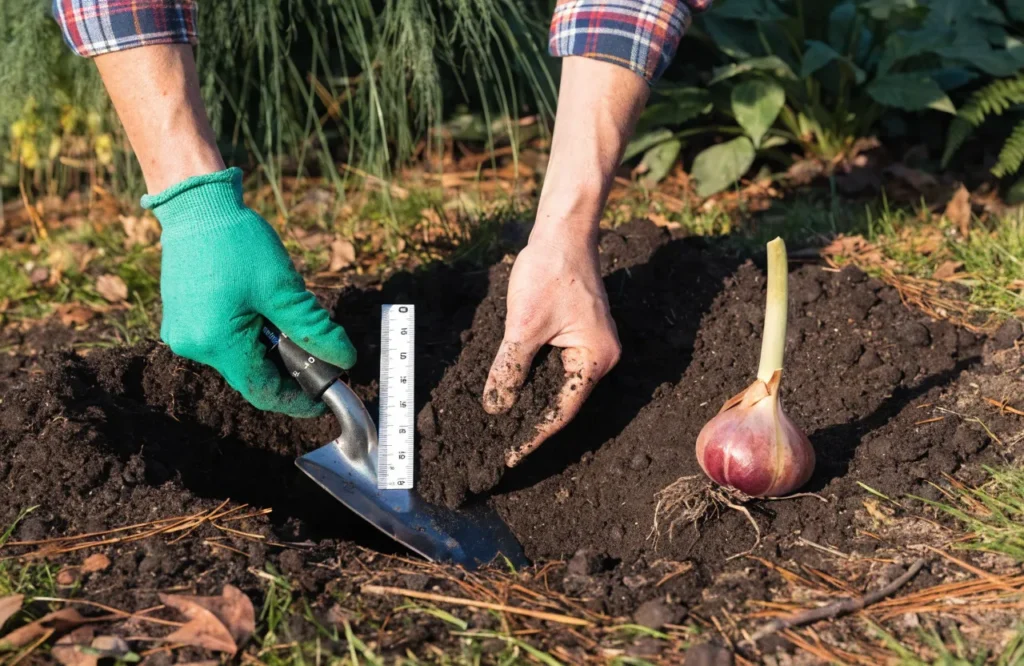
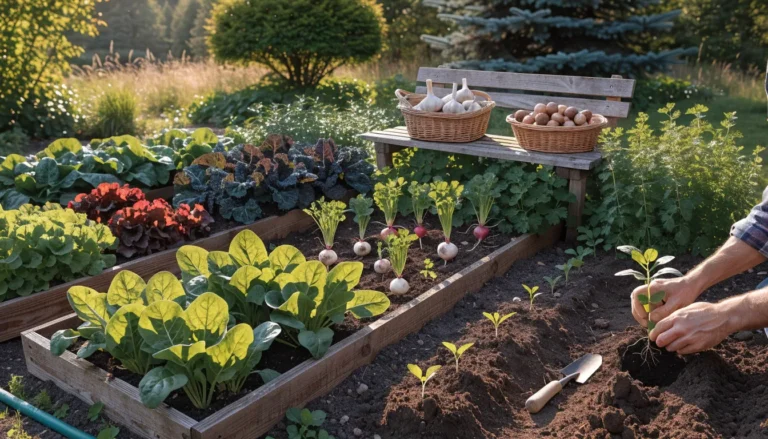
These eight steps show how to plant spring bulbs in the ground for strong, reliable flowers.
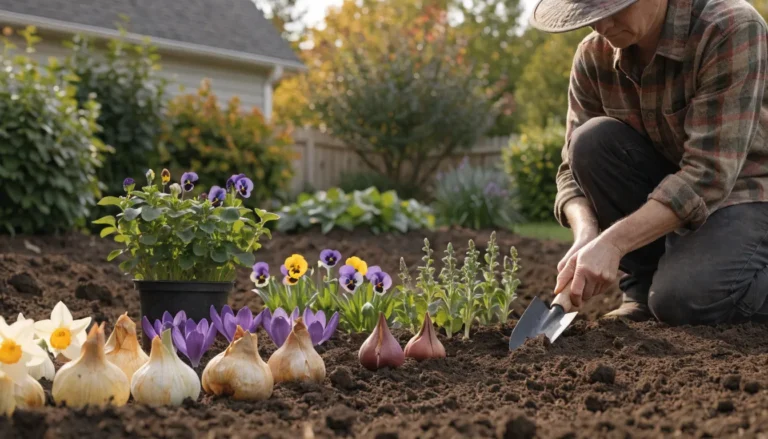
Step 1: Prepare the soil. Loosen the soil to about 30 cm (12 in) and remove weeds and stones. Mix in compost or leaf mold, plus grit if your soil is heavy.
Step 2: Work out the depth. Start with the depth recommended on the bulb packaging or in the chart below. The general rule is two to three times the height of the bulb, measured from the base of the bulb to the soil surface. A 5 cm (2 in) bulb goes into a hole 10–15 cm (4–6 in) deep.
Soil type can nudge this slightly. In very sandy soil, planting a little deeper helps protect bulbs from drying out. In heavy, poorly drained clay, improving drainage with grit and compost, or planting in a raised bed, matters more than changing the depth.
Step 3: Dig the hole or trench. For a few bulbs, use a trowel or bulb planter. For drifts, dig one wide trench or bed to the right depth and place the bulbs inside, which is much faster than individual holes.
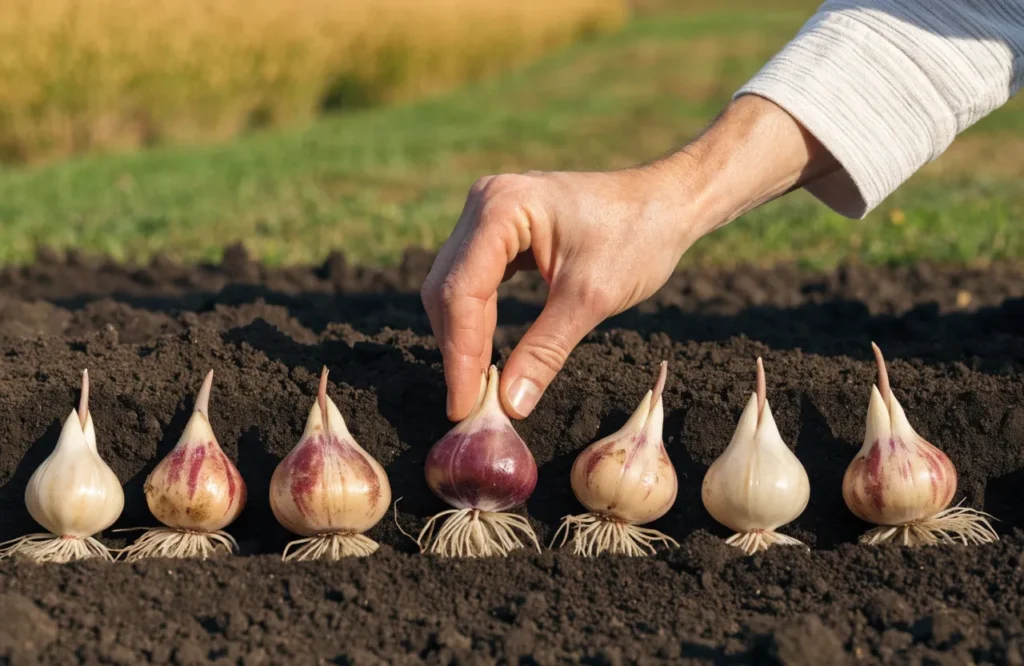
Step 4: Place the bulb, pointed end up. Roots grow from the flat, often rough, base, so set the base down. If you can’t tell which end is which, plant the bulb on its side and it will find its way. For tulips, point the flat side of the bulb toward the front of the border, since the first leaf grows outward from that side and gives a neater display.
Step 5: Space them correctly. Aim for roughly two to three bulb widths between bulbs, or follow the chart. In beds, plant in clusters of at least 5–7 bulbs rather than single rows. Clusters look more natural and have much more impact.
Step 6: Backfill and firm. Cover with soil and firm gently to remove air pockets that could dry the roots.
Step 7: Water and mulch. Water well once to settle the soil and start root growth. After that, natural rain is usually enough. Add a thin layer of mulch to protect against frost and moisture loss.
Step 8: Mark the spot. Add a label so you don’t dig up the bulbs when planting something else later.
Spring Bulb Depth and Spacing Chart
This chart takes the guesswork out of how to plant spring bulbs at the right depth and spacing. Measure depth from the base of the bulb to the soil surface, and check your supplier’s instructions too, as varieties differ.
| Bulb | Planting depth | Spacing | Plant in | Flowers |
|---|---|---|---|---|
| Daffodils (Narcissus) | 15 cm (6 in) | 10–15 cm (4–6 in) | Sep–Oct | Mar–Apr |
| Tulips | 10–15 cm (4–6 in) | 10 cm (4 in) | Oct–Nov | Apr–May |
| Hyacinths | 10 cm (4 in) | 8–10 cm (3–4 in) | Sep–Nov | Mar–Apr |
| Alliums (large) | 10–20 cm (4–8 in) | 10–20 cm (4–8 in) | Sep–Nov | May–Jun |
| Crocus | 5–10 cm (2–4 in) | 5–8 cm (2–3 in) | Sep–Oct | Feb–Mar |
| Snowdrops | 5–10 cm (2–4 in) | 5–8 cm (2–3 in) | Sep–Oct, or “in the green” Feb–Mar | Jan–Mar |
| Grape hyacinth (Muscari) | 8–10 cm (3–4 in) | 5–8 cm (2–3 in) | Sep–Nov | Mar–Apr |
| Anemone blanda | 5 cm (2 in) | 5–8 cm (2–3 in) | Sep–Nov | Mar–Apr |
| Dwarf iris (reticulata) | 5–8 cm (2–3 in) | 5–8 cm (2–3 in) | Sep–Nov | Jan–Mar |
| Snake’s head fritillary | 10 cm (4 in) | 10 cm (4 in) | Sep–Oct | Apr |
| Scilla (squill) | 5–8 cm (2–3 in) | 5–8 cm (2–3 in) | Sep–Nov | Mar–Apr |
Bloom times are for a temperate climate and shift with region and weather. Larger-than-average bulbs can go a little deeper.
A note on snowdrops: Dry snowdrop bulbs are notoriously fickle. For best results, buy them “in the green” (actively growing, with leaves) in late winter and plant them straight away.
How to Plant Spring Bulbs in Pots
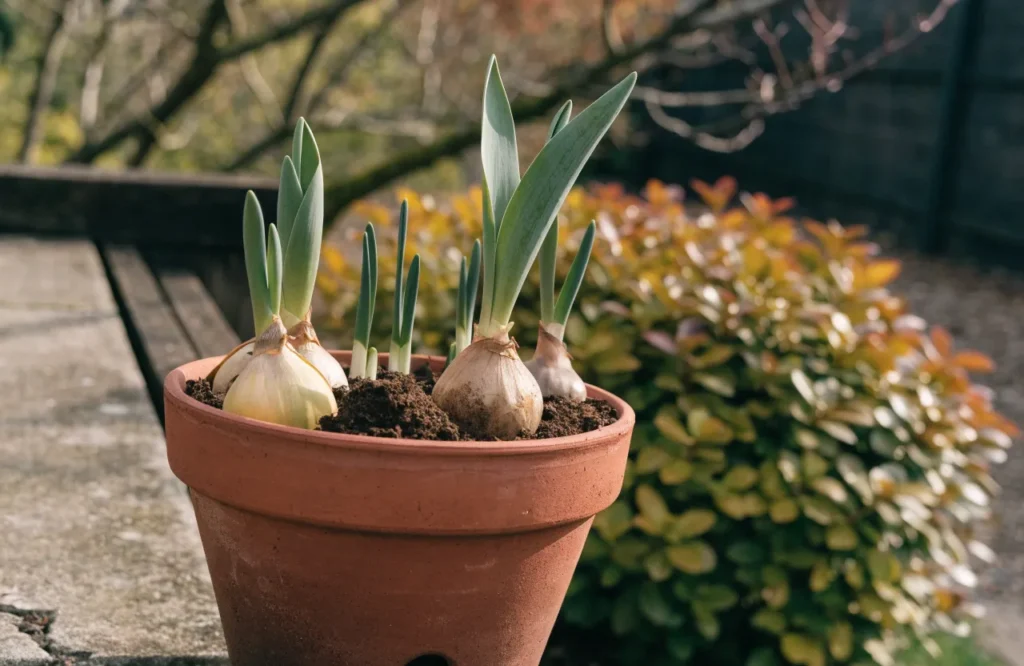
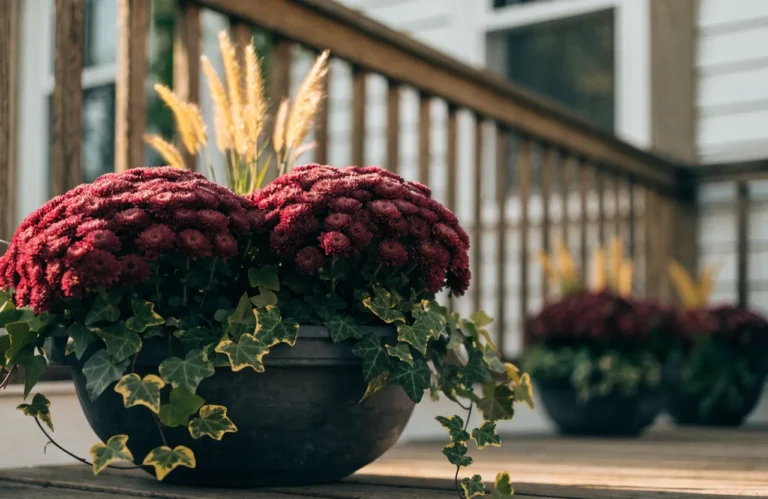
Containers suit patios, balconies, and heavy or poorly drained gardens. You can also move a pot into a prominent spot as the bulbs come into flower, and a pot of tulips or hyacinths by the door is one of the easiest front porch flower pot ideas for spring.
Here’s how to plant spring bulbs in pots in five steps:
- Choose a pot with drainage holes, ideally frost-proof and at least 25–30 cm (10–12 in) deep.
- Use a free-draining potting mix, such as multi-purpose compost with a handful of grit mixed in. Raise the pot on pot feet if drainage is slow.
- Half-fill the pot, then set the bulbs pointed end up. In pots you can plant bulbs much closer together than in the ground, almost but not quite touching. Keep the depth similar to in-ground planting.
- Cover with compost and water well.
- Position in a sheltered spot and check monthly. Winter compost should be damp, not soggy.
Tip: Cover the surface with fine wire mesh or a layer of grit to deter squirrels.
How to Make a Bulb Lasagne
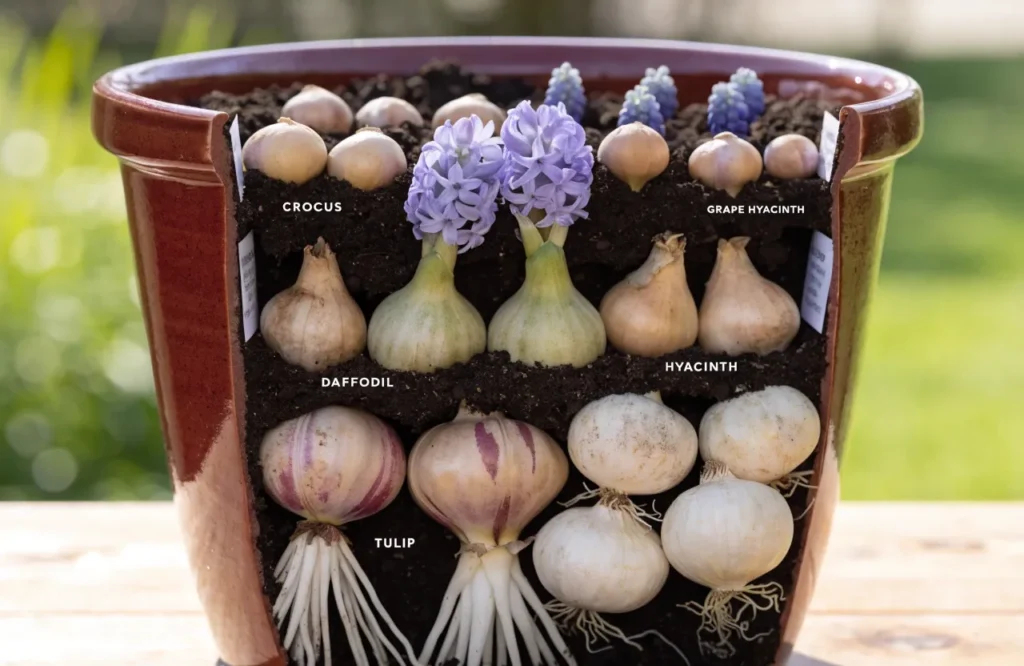
A bulb lasagne stacks several types of bulb in layers in one deep pot, so flowers appear in waves from late winter to late spring. It’s an effective way to get months of color from a single container.
You’ll need a pot at least 35–40 cm (14–16 in) deep and wide, with drainage holes. Build it from the bottom up, with the latest bloomers deepest:
| Layer | Depth below soil surface | Bulbs | Flowers |
|---|---|---|---|
| Bottom | ~25 cm (10 in) | Late tulips or large alliums | Apr–Jun |
| Second | ~18 cm (7 in) | Daffodils | Mar–Apr |
| Third | ~12 cm (5 in) | Hyacinths or early tulips | Mar–Apr |
| Top | ~7 cm (3 in) | Crocus, muscari, dwarf iris | Feb–Mar |
Add compost between each layer, and set each layer’s bulbs so they sit between the bulbs below. The shoots will find their way around them. Finish with compost, water thoroughly, and top with winter pansies if you’d like something to look at while you wait. Once the pot is in flower, it makes an easy centerpiece for spring porch decorating.
How to Plant Spring Bulbs in a Lawn
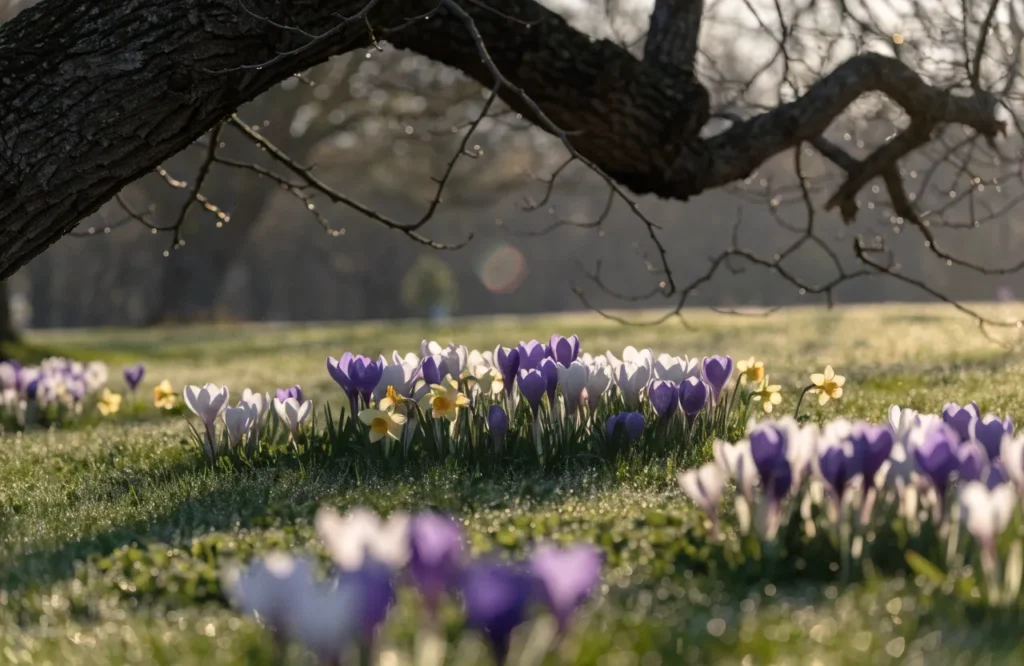
Bulbs scattered through grass look effortless and multiply over the years. If you’re wondering how to plant spring bulbs in grass, the trick is to scatter them rather than line them up. The best choices are crocuses, daffodils, snowdrops, scilla, snake’s head fritillary and camassia.
- Mark an irregular, rounded area with a hose or rope. Natural colonies have soft, uneven edges.
- Scatter the bulbs by tossing them gently over the area, then plant them roughly where they land. Move any that are too close together, and place a few outside the outline for a more natural drift.
- Lift a flap of turf for small groups, or use a long-handled bulb planter for individual bulbs. Plant at the correct depth, then replace the turf and firm it down.
- Water in and top-dress lightly with compost.
The golden rule of lawn bulbs: Don’t mow until the foliage has died back naturally, at least 6 weeks after flowering. Expect a slightly untidy patch in late spring. If you can’t accept that, keep bulbs to beds and borders.
Spring Bulb Design Ideas
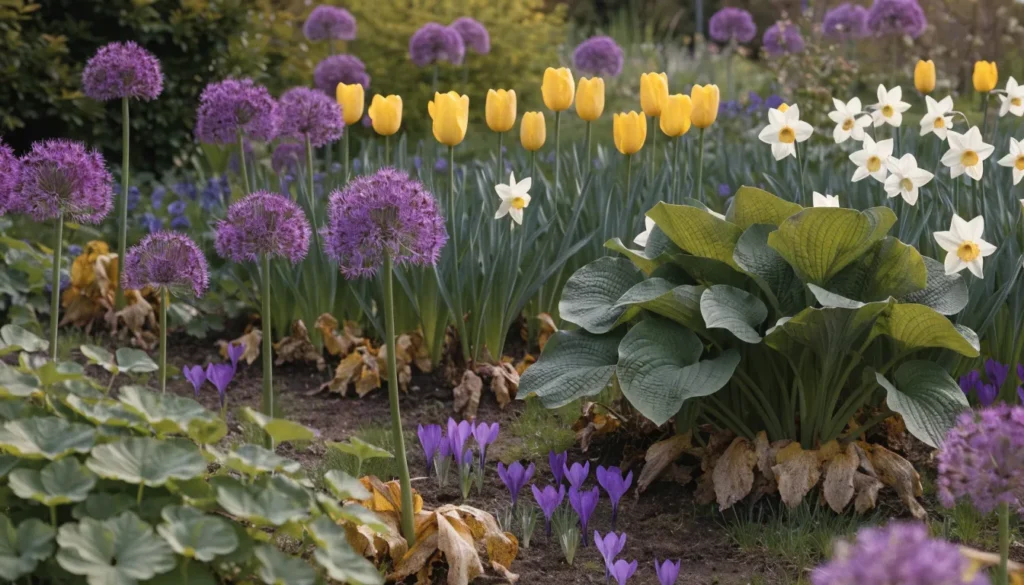
- Plant in drifts and clusters, in odd numbers such as 5, 7 or 9 of one type. Rows look stiff.
- Layer heights: tall bulbs (alliums, tulips) at the back, short ones (crocuses, muscari) at the front.
- Stagger bloom times by mixing early, mid and late varieties so something is always in flower.
- Hide fading foliage by planting among emerging perennials such as hostas, hardy geraniums, daylilies, coral bells, brunnera, sedum or hellebores. As the bulb leaves yellow, the perennial growth takes over.
- Think about color. Pair complementary colors (purple alliums with yellow tulips) or stick to one or two colors for a cleaner look.
- Plan for the rest of the year. Bulbs are finished by early summer, so pair them with fall-blooming flowers that take over later, and the same bed will have color in more than one season.
Watering and Feeding Spring Bulbs
Watering: Water once at planting. After that, fall and winter rain is normally enough. Overwatering is a bigger risk than underwatering, but bulbs in pots shouldn’t dry out completely.
At planting: In reasonably fertile soil, bulbs need little extra. A general bulb fertilizer is enough if your soil is poor. You don’t need bone meal simply because you’re planting bulbs. It is high in phosphorus, low in nitrogen and potassium, and the smell can attract digging animals, so a balanced bulb feed, alfalfa meal or seaweed meal is a more useful choice.
After flowering: This is the most valuable feeding time. Apply a high-potash liquid feed (such as tomato feed) every 1–2 weeks while the foliage is green, to help the bulb store energy for next year.
How to Protect Bulbs From Squirrels and Other Pests
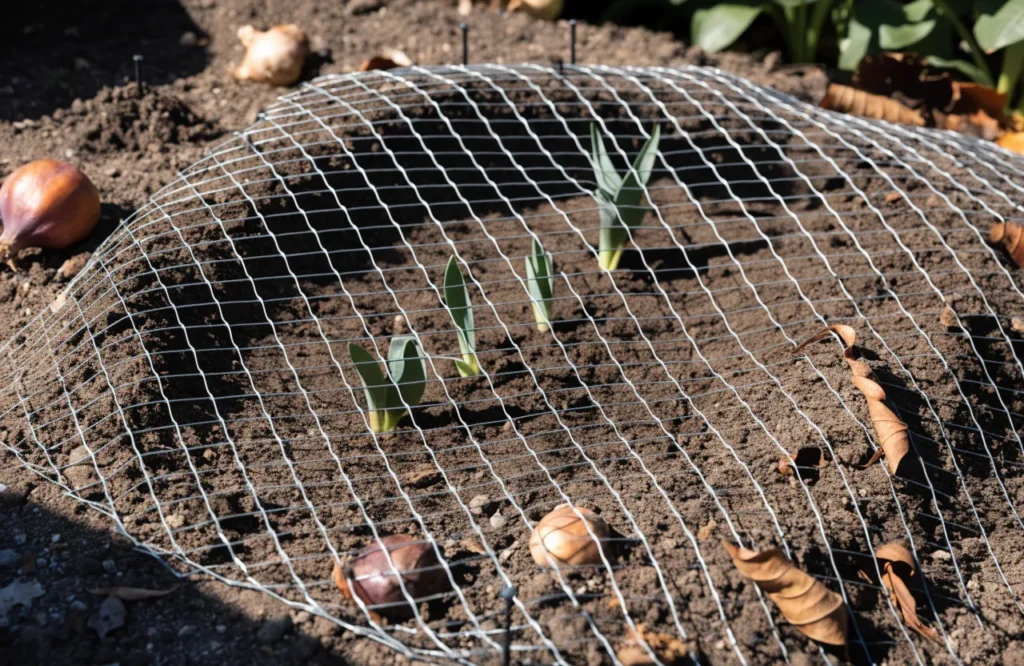
Tulips and crocuses are favorite snacks for squirrels and mice, and deer will browse tulips above ground.
- Cover the planted area with chicken wire or stiff mesh, pinned down and lightly covered with soil or mulch. Remove it in spring so shoots can push through.
- Plant in bulb cages or baskets, especially useful for prized tulips.
- Top the soil with grit or crushed shells to deter digging.
- Choose critter-resistant bulbs. Daffodils, alliums, snowdrops, fritillaries and grape hyacinths are toxic or unpalatable to most rodents and deer. Planting them around tulips can help, though it’s not a guarantee.
- Don’t leave bulb skins or bone-based fertilizer on the surface.
Aftercare: What to Do After Flowering
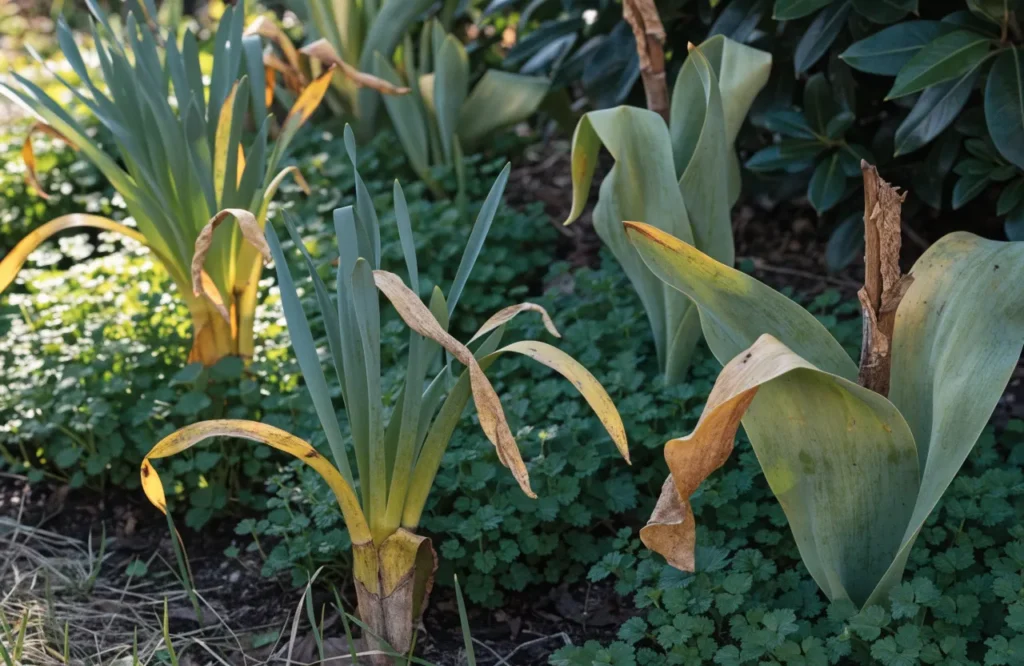
Knowing how to plant spring bulbs is only half the job. What you do after flowering decides whether they come back next year.
- Deadhead the spent bloom or cut the flower stem, but leave the leaves. They are recharging the bulb.
- Wait until the foliage turns yellow and pulls away easily before removing it, usually about 6 weeks after flowering.
- Feed with a high-potash fertilizer while the leaves are green.
- Divide congested clumps when the leaves die back. Daffodils and snowdrops that have stopped flowering well are often overcrowded.
- Be realistic about tulips. Many modern hybrids flower well for only a year or two. Species tulips and Darwin hybrids are better at returning. For reliable color, replant fresh tulip bulbs each fall.
- Mark where bulbs are so you don’t disturb them while dormant.
Why Didn’t My Spring Bulbs Flower?
Most problems come down to timing, depth, drainage or aftercare rather than the bulb itself. If you followed the steps on how to plant spring bulbs and still had no flowers, check the likely causes below.
| Problem | Likely cause | Fix |
|---|---|---|
| Leaves but no flowers (“blind” bulbs) | Foliage removed too soon last year, too little sun, or overcrowding | Leave foliage until yellow, feed after flowering, divide clumps, move to a sunnier spot |
| Bulbs didn’t come up | Rot from wet soil, eaten by rodents, or planted too deep | Improve drainage, protect with mesh, follow the depth chart |
| Shoots frost-damaged | Planted too shallow, or a very early start | Plant deeper next time; hardy bulbs usually recover |
| Small, weak flowers | Small bulbs, poor soil, or too little feeding | Buy larger bulbs, feed after flowering |
| Flowers came late | Planted too deep, or planted late | Check depth and timing |
| Tulips flowered once then faded | Hybrid tulips are often short-lived | Replant fresh bulbs, or choose species tulips |
Spring Bulbs vs Summer Bulbs
Many people search for “bulbs to plant in March” and find advice on how to plant spring bulbs that doesn’t apply. The two groups follow opposite calendars.
| Spring-flowering bulbs | Summer-flowering bulbs | |
|---|---|---|
| Planted | Fall | Spring, after frost risk has passed |
| Cold needs | Need a cold period, which varies by type | Tender; can’t tolerate frost |
| Examples | Tulips, daffodils, crocus, hyacinths | Dahlias, gladioli, cannas, lilies, begonias |
| After flowering | Usually left in the ground in cold climates | Often dug up and stored in cold climates |
If it’s March and you want to plant bulbs, choose summer-flowering types. Spring bulbs sold already growing in pots can also be planted now.
Forcing Spring Bulbs Indoors
You can enjoy spring flowers in midwinter by forcing bulbs to bloom indoors. Hyacinths, paperwhite narcissus, crocuses and small daffodils all work well. Buy bulbs labeled “prepared” or “for forcing” where possible. Forced bulbs sit nicely alongside the other indoor flowering plants that keep a home colorful through the darker months.
- Plant bulbs in a pot of compost with the tips just showing, or in a forcing vase with the base just above the water so roots can reach it without the bulb sitting in it.
- Chill in the dark for roughly 8–12 weeks in a cool place (about 5–9°C / 41–48°F), such as a cold garage, unheated cellar or refrigerator. Paperwhites are the exception, as they don’t need chilling.
- Bring into light once shoots are 5 cm (2 in) tall or more, first into a cool, bright spot, then into warmth for flowering.
- Keep the water level just below the bulb in vases, and change it regularly.
Forced bulbs are usually exhausted after flowering, but hardy varieties can be planted out in the garden.
Frequently Asked Questions
Final Thoughts
Now that you know how to plant spring bulbs, get four things right and even the simplest planting will reward you each spring: timing, drainage, depth, and leaving the leaves alone. Mix early, mid and late bulbs and you’ll have color from the first crocus in late winter to the last allium in early summer.